

Fastly for Magento 2 is the top requirement for Magento Commerce Cloud, and it is used in Staging and Production environments. It works with Varnish to provide fast caching capabilities and a Content Delivery Network (CDN) for static assets.
This feature also includes a Web Application Firewall (WAF) to secure your site and Cloud infrastructure. You must route all incoming site traffic through Fastly to ensure the safety of users and Cloud infrastructure from malicious traffic and attacks.
Here are the steps to enable, configure, and test Fastly early in your site development process to enable secure access to your site.
- Install Fastly extension
- Configuring the Fastly_Cdn Module
- Update DNS configuration to route traffic to the Fastly service
- Test Fastly caching
Contents
I. Install Fastly Extension
Before installing Fastly, you should set up a test environment. This must be done as you will put Fastly in front which certainly takes a while for configuring and testing. If you directly roll out this solution to your production server you might experience issues that could affect your normal business operation.
Next, ensure that your Magento 2 store is running without encountering any problems in your environment as debugging Magento 2 issues with Fastly in front might be difficult.
Fastly_Cdn supports Magento2 Community and Enterprise Edition from version 2.0 onwards.
You also need to sign up for a free account with fastly.com to be able to use the module. If you need professional services for assistance with setting up your environment, please contact [email protected].
The installation of the Magento module is pretty easy and developers can carry out different methods depending on your Magento version.
- Install from Magento Marketplace (only Magento 2.2.x versions) (please follow the instructions below)
- Use Composer
- Install from the Zip file

Installing from the Magento Marketplace using Web Setup Wizard
This will require an account on Magento Commerce and the use of the associated API tokens sync to sync with the marketplace.
- Open a browser to the Magento Marketplace and add the module to the cart. Check out and ensure that this is added to your account.
- Log in to the admin section of the Magento system where you will install the module as an administrator.
- Start the Web Setup Wizard by navigating to ‘System > Web Setup Wizard’.
- Click ‘Component Manager’ to synchronize with Magento Marketplace.
- Click to ‘Enable’ the Fastly_Cdn module. This will start the wizard.
- Follow the on-screen instructions, being sure to create backups.
- Proceed to Configure the Module.
II. Configuring The Fastly_Cdn Module
1/ Prerequisites
To proceed with the configuration you need to complete the registration for Fastly’s service in advance.
The API token is also a requirement (https://manage.fastly.com/account/personal/tokens). Details of how to find these can be found in Fastly’s documentation.
2/ Configure the Fastly Service
To start configuring the Fastly service for use with Magento, make sure that you have signed up for the service. Once you have confirmed the account and logged in to the Fastly application, a wizard to configure your first service will then be displayed. Further explanation is in Fastly’s documentation.
3/ Configure the Module
This section will guide you on how to input the API token and service ID into the Fastly_Cdn module. In this stage, users are assumed to have the module installed without any error. If you have yet to finish this process, please see Installing the module for details of how to do this.
To enter the credentials for the Fastly_Cdn module, open a browser and log in to the admin section of the Magento server. Navigate to: Stores > Configuration > Advanced > System
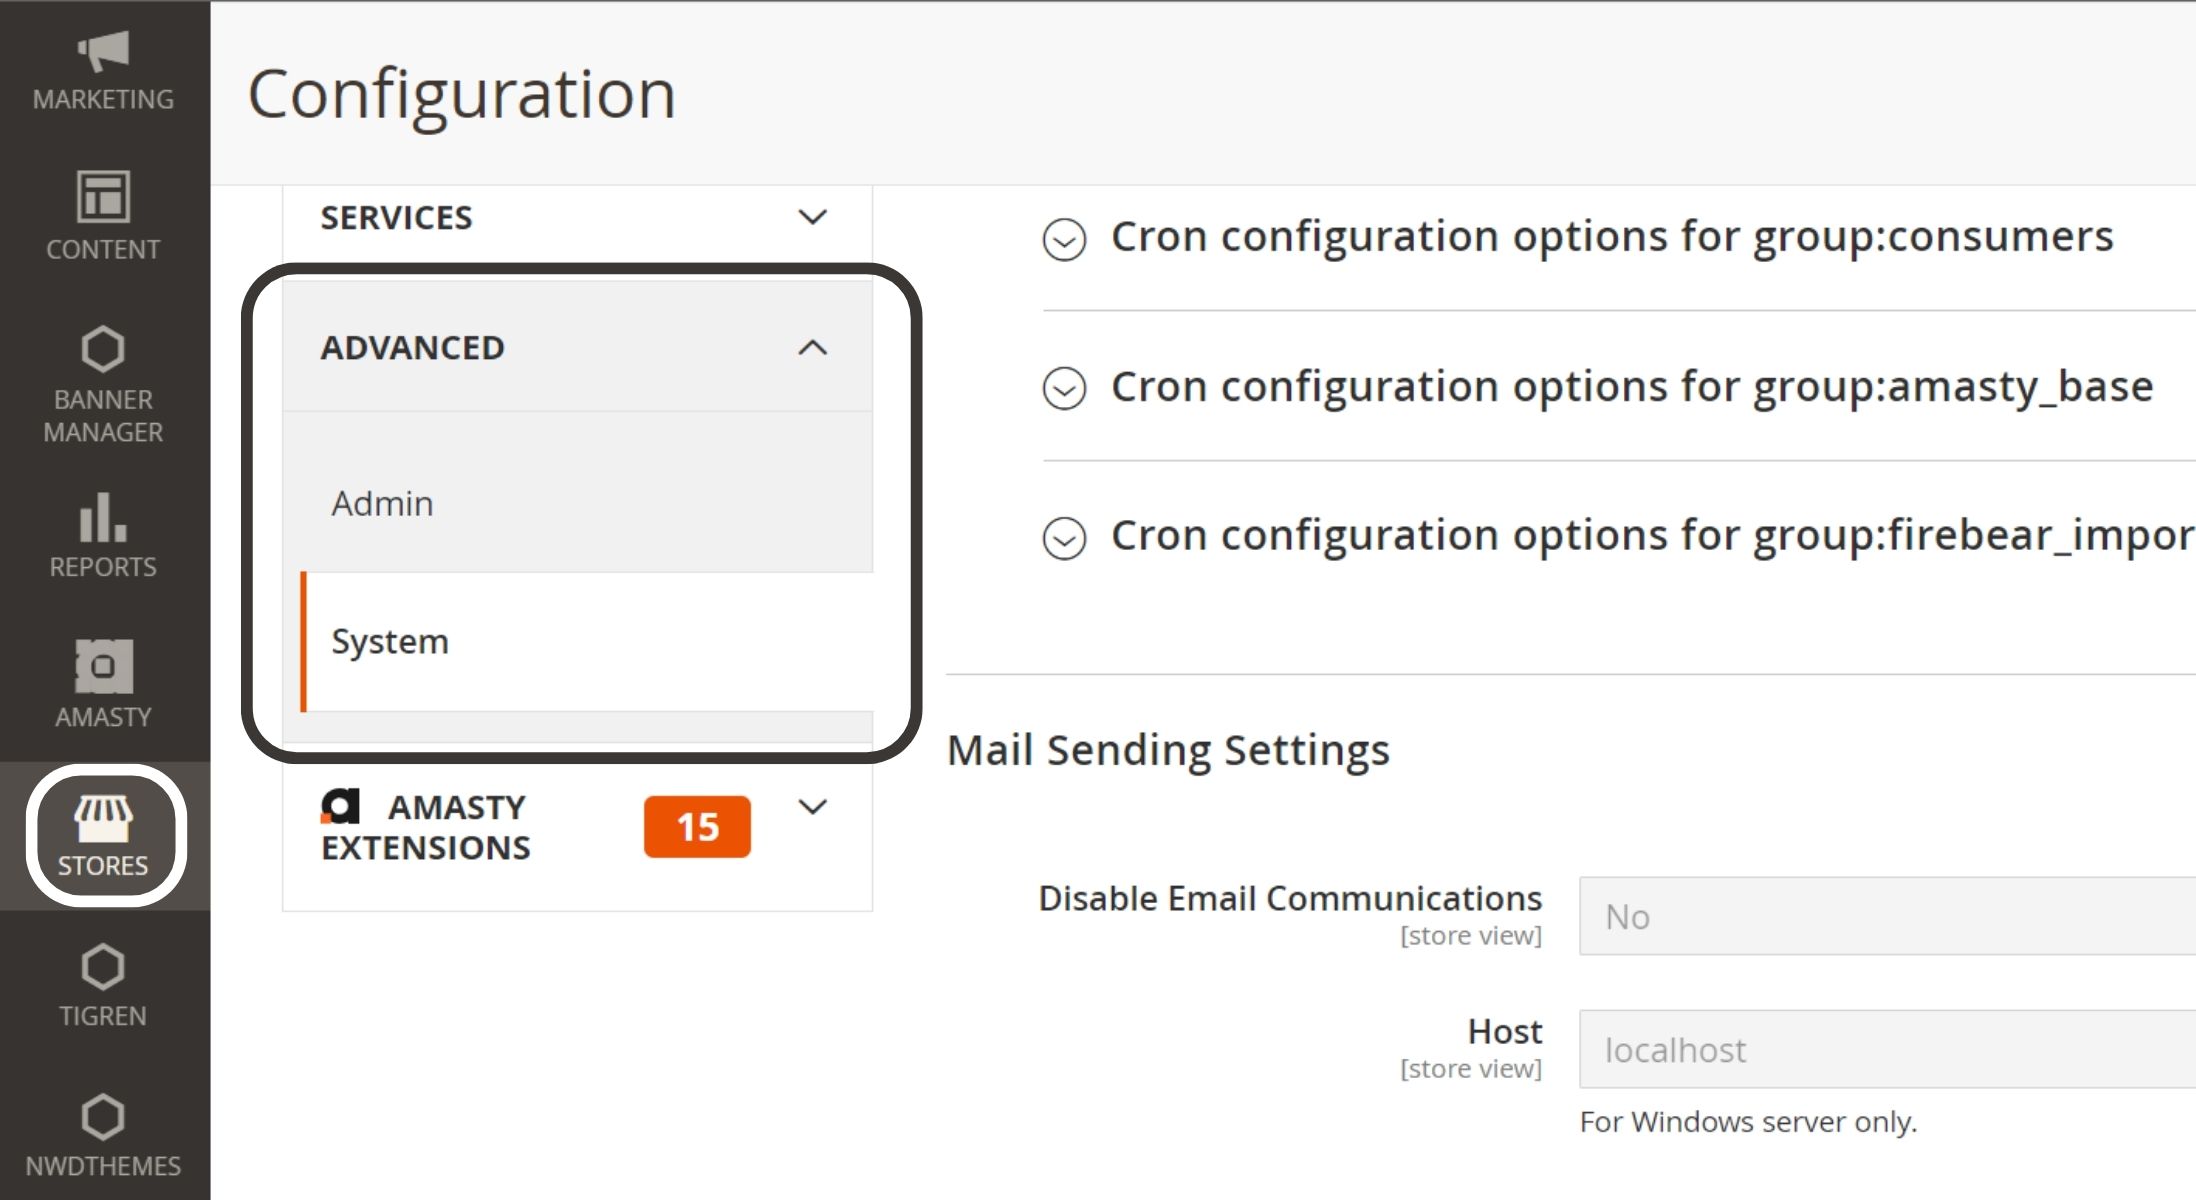
- Expand the ‘Full Page Cache’ section then choose ‘Fastly CDN’ in the ‘Caching Application’ dropdown.
- Adjust the TTL for public content to match the needs of the server. (This value is in seconds.)
- Expand the ‘Fastly Configuration’ section to enter the remaining necessary details.
- In the ‘Fastly Service ID’ enter the service ID configured when signing up for Fastly’s services above and in ‘Fastly API token’ enter the token. Test your API Token and Service ID pair by using the button. If your credentials are valid, you may then automatically upload the Magento VCL to your Fastly service and the version will be activated. Make sure to click ‘Save Config’ at the top of the page and then clear the Magento cache so that the changes can be implemented.
- This is enough to start testing Fastly and the following steps are for further configuration to change other settings.
4/ Further Configuration Options
Stale content delivery time
Fastly Magento 2 can serve stale content even if the TTL has expired. During the time it takes Fastly to fetch the fresh content from Magento it can serve stale content from its cache.
This setting defines the time in seconds to allow Fastly to serve stale content after the “normal” TTL has expired.
Stale content delivery time in case of backend error
This setting defines the time in seconds that stale content can be delivered in case the backend is down or unable to respond properly.
Purge category
When enabled, this configures the module to listen for events that clearly generated content for a ‘category’ and ties a cache purge to Fastly with these. Once cleared, new content can be fetched and cached thus updating the content.
Purge product
When enabled, this configures the module to listen for events that clear generated content for a ‘product’ and ties a cache purge to Fastly with these. Once the clearing stage is done, new content can be fetched and cached so the content is updated.
Additionally, if the “Purge Category” option is set to “Yes”, this also triggers the product’s categories to be purged on product/product stock update. This option is useful to keep product pages and categories up-to-date when the good becomes out of stock (i.e. when the last item is purchased by a customer).

Purge CMS page
This option binds the automatic purge of the CMS page (Fastly) cache with its update event. If set to “Yes” the CMS page cache is invalidated each time the CMS page update event occurs (i.e. CMS page content update via Magento admin).
Use Soft Purge
Using soft purge will not remove the content immediately from Fastly’s cache but mark it as stale. In combination with the stale timings, your customers will be served stale content very fast while Fastly is updating the content in the background.
GeoIP handling
GeoIP handling will figure out the country from where a client is viewing the pages based on its IP address. This feature can be used to either automatically redirect visitors to the store matching their country or to show them dialogue to select the desired store themselves.
Configuration
In your Magento2 backend go to Stores -> Configuration -> System in the “Advanced” section and open the “Full Page Cache” tab and choose “Yes” with “Enable GeoIP”. Make sure to be on the store configuration scope when completing this step.
General behavior
The Fastly for Magento 2 module supports two options to serve the store view based on GeoIP country code. It can show the visitor a modal dialogue to offer him an option to switch to a frontend that fits his country. The second option allows the redirection process to complete automatically. Both actions use JavaScript to perform. There would be adjustments if necessary.
In the VCL, there are examinations for cookie headers.
If either the X-Magento-Vary or form_key cookie is present, this Fastly will not take any action as it presumes the customer either saw (and maybe interacted with) the modal dialogue or was automatically redirected to the matching store.
If the form_key cookie is present the visitor has been browsing around so there wouldn’t be dialogues or redirects to disturb him.
GeoIP Action
Choose “Dialog” to show a modal dialogue to the visitor. He will receive the option to switch to the suggested store based on the GeoIP lookup and the “GeoIP Country Mapping” (see below) or stay on the current front end. The “Redirect” button will then send the visitor to an appropriate store to view the products.

GeoIP Country Mapping
For every country, if you want to map to a specific store, you will have to enter a country code and select a target store. All country codes use ISO 3166-1-alpha-2 codes. You can use “*” as a wildcard to match all country codes.
Prevent redirect or static blocks to be shown
You probably don’t want to redirect your customers to another store if the visitors’ country already matches the current store. To prevent this incident, you have to add a map using the country code of that store and leave the other fields empty.
In this way, if your customer is already at the “right” store (based on the country), triggering GeoIP-based action will not happen.
III. Update DNS Configuration To Route Traffic To The Fastly Service
Step 1: Test Fastly caching
You can configure and test Fastly caching in Staging and Production environments with these URLs:
- For Pro Staging and Production:
mcprod.<your-domain>.commcstaging.<your-domain>.com
- For Starter Production only:
mcprod.<your-domain>.com
You must update your DNS configuration to route traffic from your store URLs to the Fastly service.
Then, you should enable the Fastly module and upload the default Fastly VCL code. Provide a list of top-level and subdomains for each environment to Adobe or submit a support ticket.
Add the domains to your Fastly service setup for Starter projects.
Consult a DNS expert to determine the correct method for updating your DNS configuration for your domain service.
Step 2: Add CNAME records
Point the pre-production URLs to the Fastly service by adding CNAME records: prod.magentocloud.map.fastly.net
Add CNAME records for domain validation and pre-provisioning of Production SSL/TLS certificates. After that, Adobe will verify the domains and issue the appropriate environment’s SSL/TLS certificate.
Once you update the DNS configuration to route traffic from these domains to the Fastly service, Adobe will upload the certificate to the environment.
Step 3: Update Adobe Commerce Base URL
Use SSH to log in to the Production environment using the following command:
magento-cloud ssh
Use the Cloud CLI to modify your store’s base URL:
php bin/magento setup:store-config:set --base-url="https://mcstaging.your-domain.com/"
Step 4: Restart And Test
- In the final step, remember to restart your web browser.
- It is important to test your website to ensure everything is working correctly.
IV. Test Fastly Caching
First, check the response headers
curl -vo /dev/null -H Fastly-Debug:1 https://<live-URL>
Use the –resolve flag to skip DNS name resolution if you haven’t finished configuring a static route or DNS for the domains on your live site.
curl -vo /dev/null -H Fastly-Debug:1 --resolve <live-URL-hostname>:443:<live-IP-address>
Then, check the headers to make sure Fastly is operating properly. The response should have the following forms:
< Fastly-Magento-VCL-Uploaded: yes
< X-Cache: HIT, MISS
Wrap Up
The blog post has covered thoroughly information about Fastly Magento 2. We hope you find the guide to set up Fastly for Magento 2 useful. Leave a comment below if you already got this function on your Magento site!
Related Posts:
How To Clear Cache In Magento 2? (3 minutes)
20+ Best Free Magento 2 Extensions
How To Add Extension Attribute To Order In Magento 2?
Magento Product Attributes: Everything Store Owners Must Know