Integrating Clerk.io with your Magento Progressive Web App (PWA) empowers you to offer tailored recommendations and track sales effectively. This blog post will guide you through the steps to seamlessly implement Clerk.io for Magento PWA, enabling you to enhance customer engagement and boost conversions.
Why Clerk.io Integration With Magento PWA?
Integrating Clerk.io with Magento PWA brings several key benefits to your online store:
- Personalized Recommendations: Clerk.io provides powerful recommendation widgets that can be seamlessly integrated into your shopping cart page, category page, and product page. These widgets enable you to display personalized product recommendations to your customers, enhancing cross-selling and upselling opportunities.
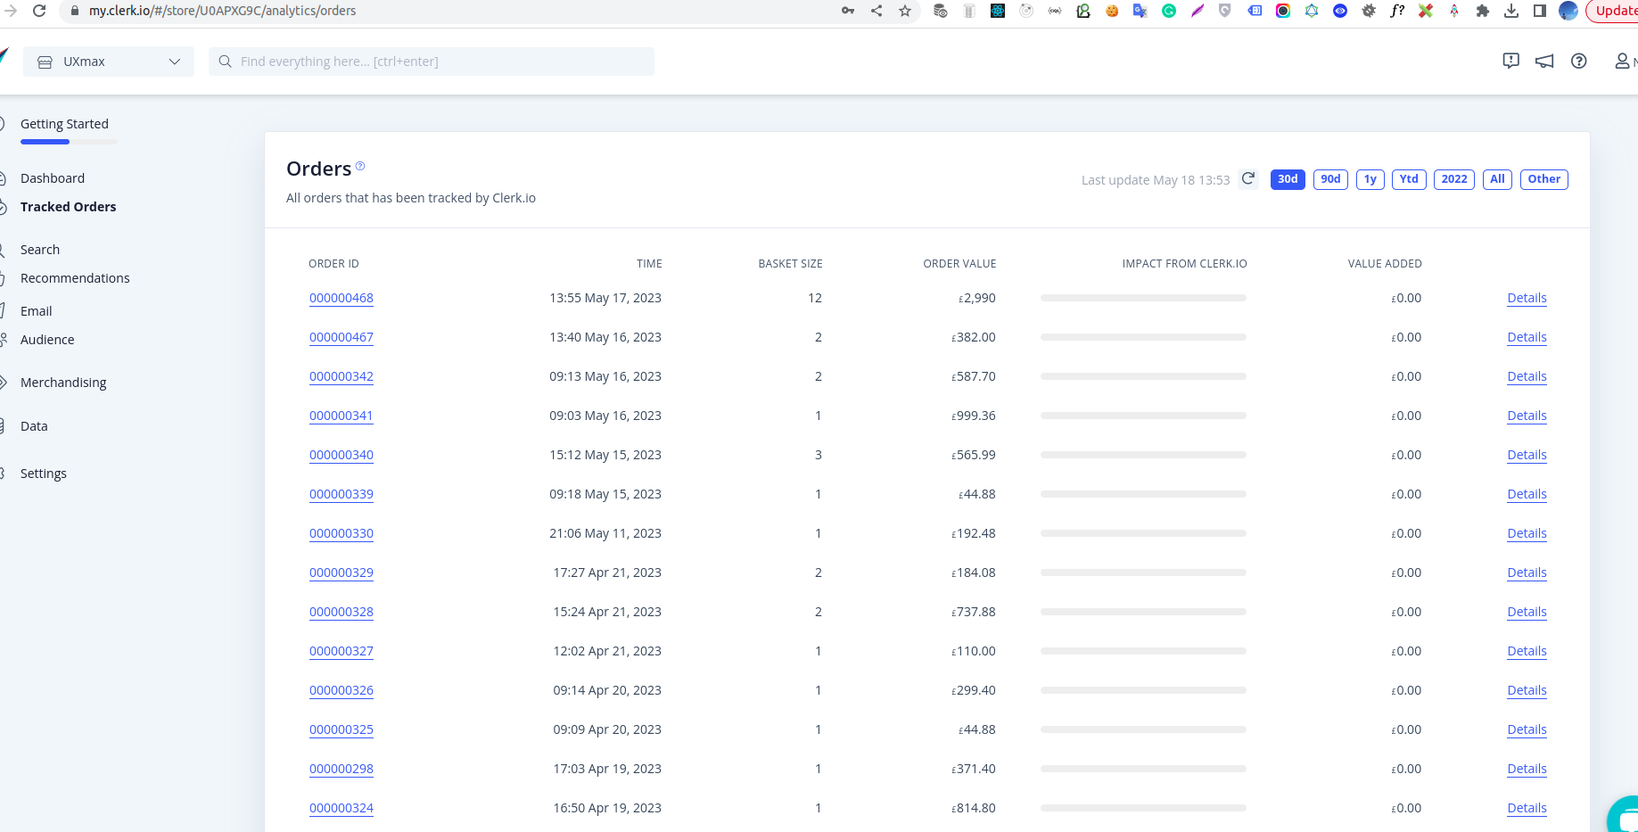
- Enhanced Sales Tracking: Clerk.io offers robust sales tracking capabilities, allowing you to gather valuable insights into customer behavior and measure the effectiveness of your marketing campaigns. By tracking sales data, you can optimize your strategies and drive revenue growth.
Key Features For Integration
Before diving into the implementation process, let’s explore the key features Clerk.io offers for seamless integration with Magento PWA:

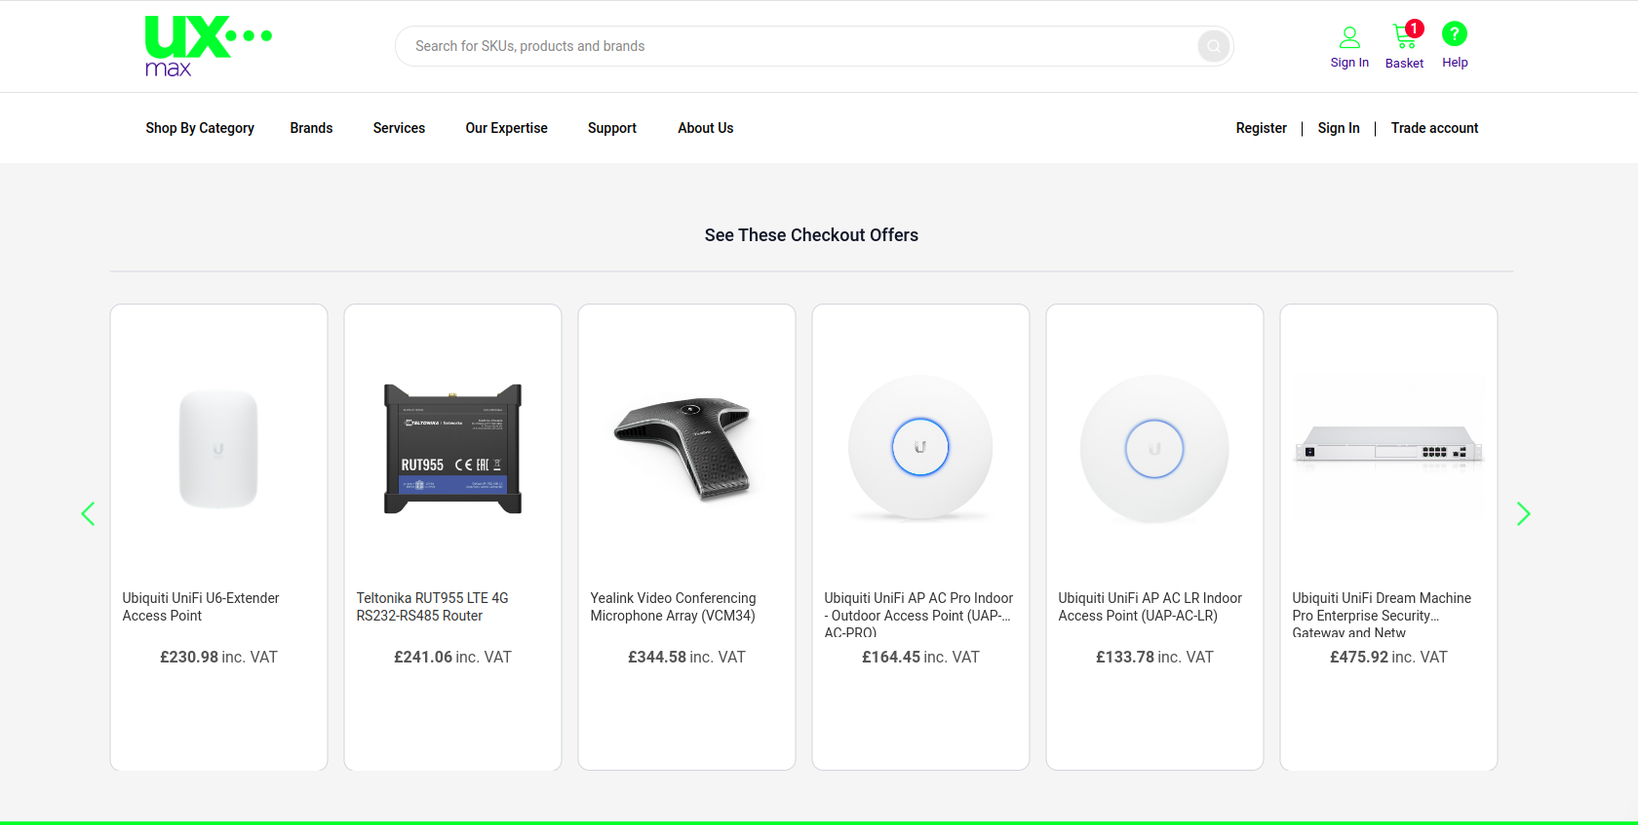
- Recommendations Widget: The recommendations widget enables you to display personalized product recommendations dynamically. Implement it on the cart, category, and product pages to drive customer engagement and conversions.
- Store Data Synchronization: Clerk.io provides a synchronization process to ensure your Magento PWA is connected seamlessly, enabling the platform to retrieve and utilize relevant data effectively.
7 Steps To Implement Clerk.io For Magento PWA
1. Create a Clerk Account and Sign in
Begin by creating a Clerk.io account and signing in to the Clerk.io dashboard.
2. Add Store
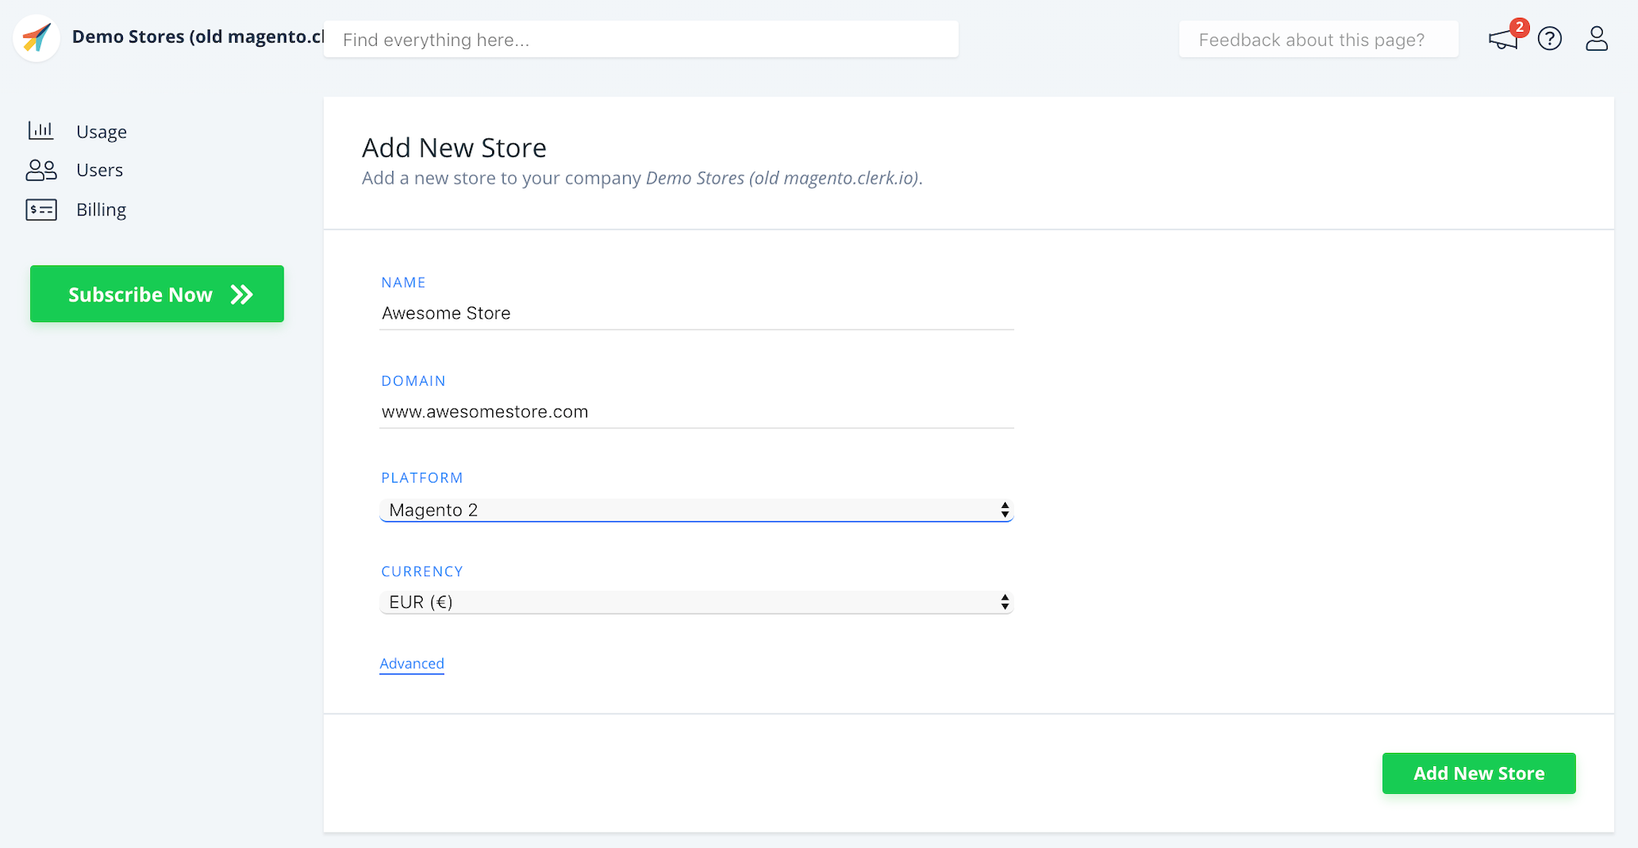
After logging in to my.clerk.io, the first step is to add your store:
- Provide the Name and Domain of your webshop
- Choose Magento 2 as the Platform
- Select your Currency
- Click Add New Store to proceed
3. Install and Configure the Extension
To integrate Clerk.io with your Magento PWA, you need to install and configure the Clerk.io extension. Follow these steps:
- Run the following commands in your terminal:
composer require clerk/magento2
php bin/magento module:enable Clerk_Clerk
php bin/magento setup:upgrade
php bin/magento setup:di:compile
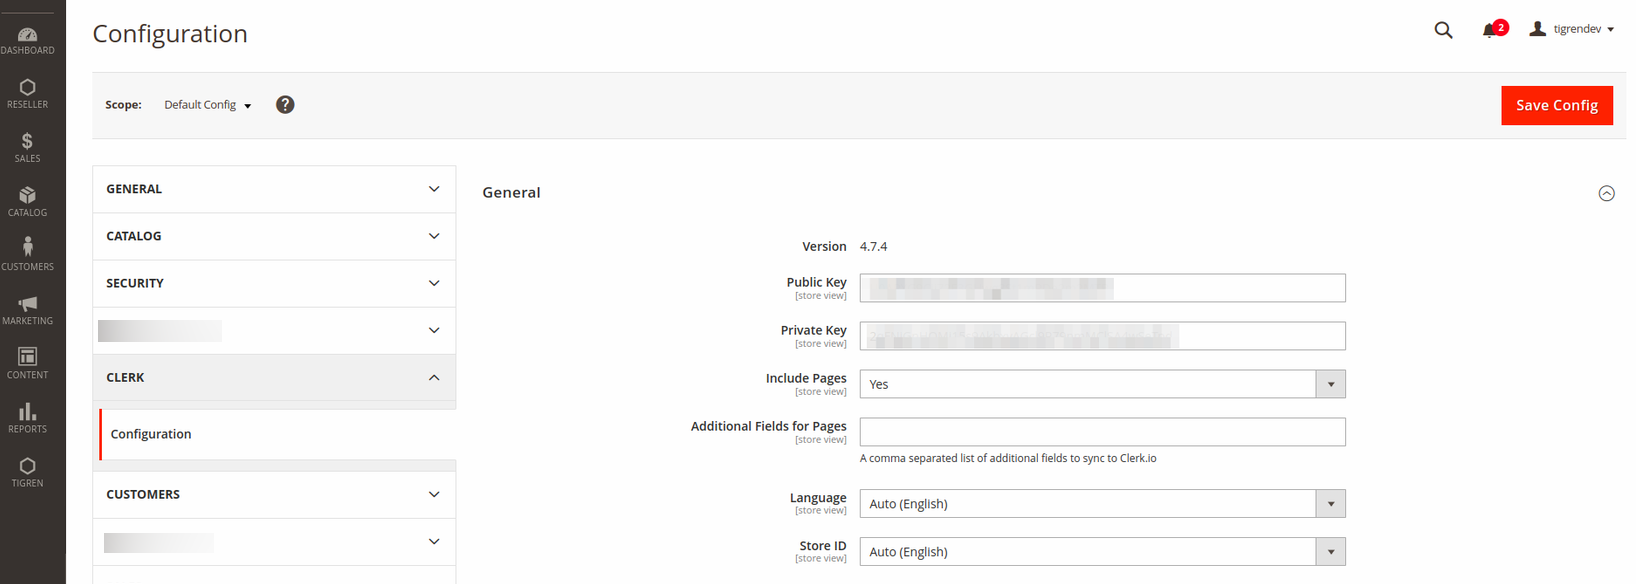
- After the extension is installed, configure it by navigating to Store → Configuration → Clerk and entering your Clerk.io API key.
4. Sync your store
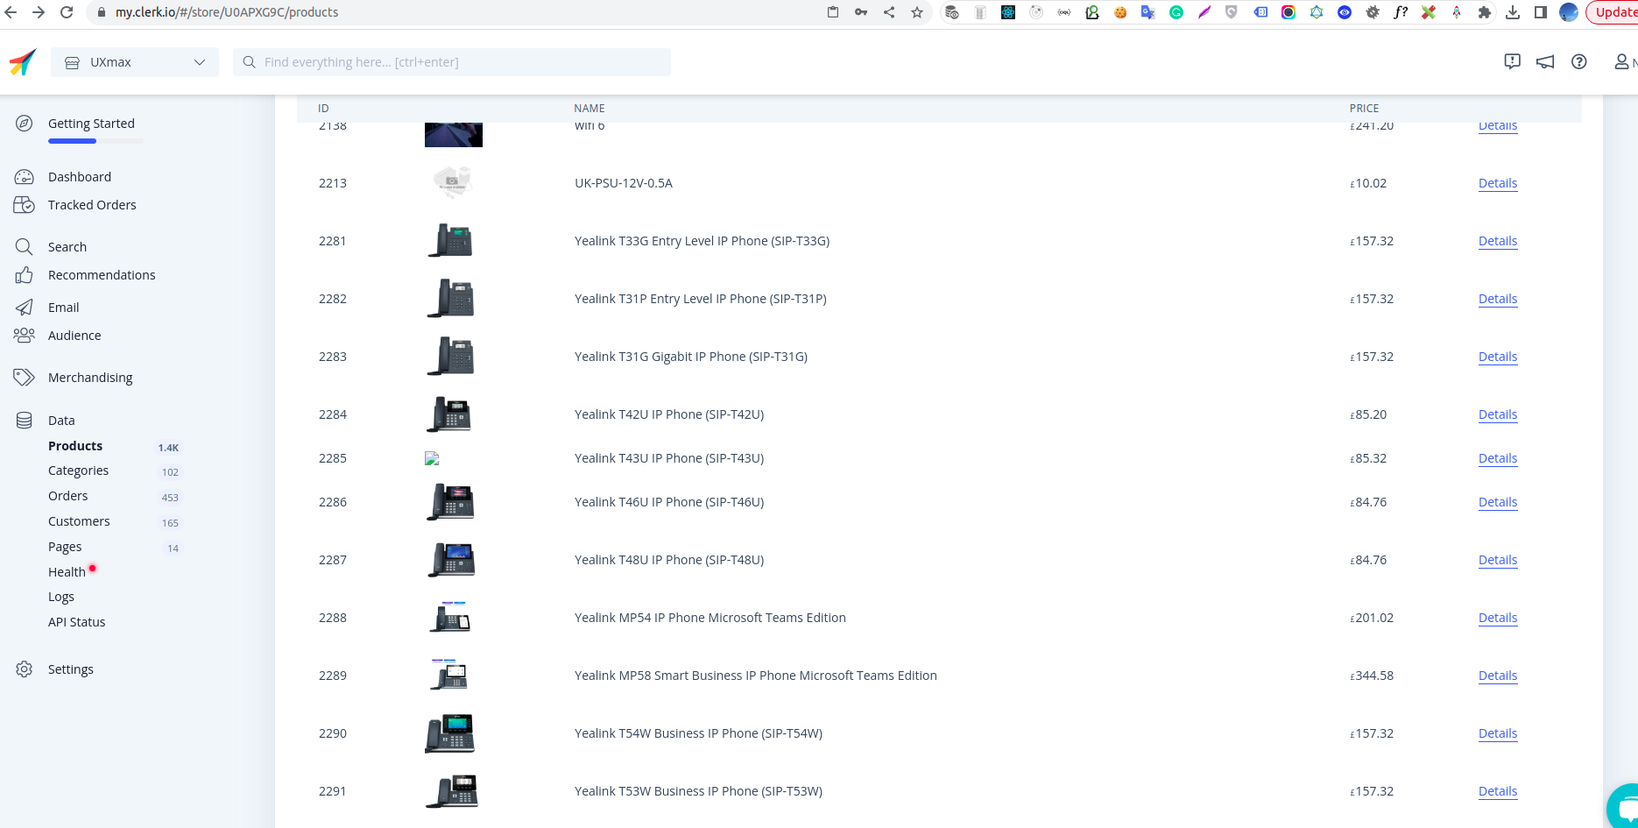
After configuring the extension, it’s important to synchronize your Magento store with Clerk.io:
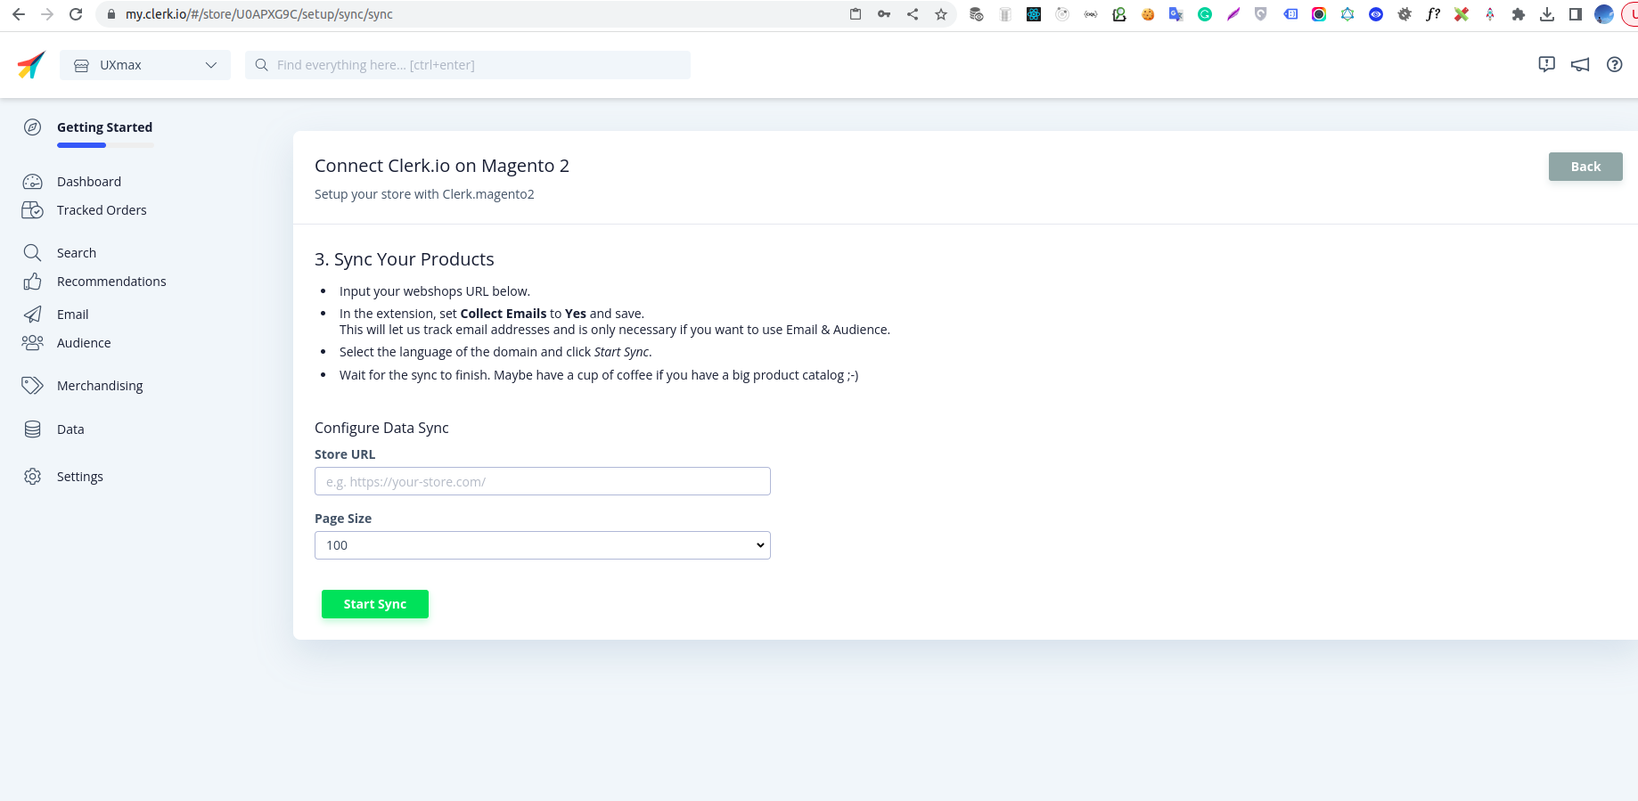
- Go back to the Setup Guide in the Clerk.io dashboard and click Sync Your Data.
- Enter your store details and click Start Sync to initiate the synchronization process. This step ensures that your store’s data is connected with Clerk.io.
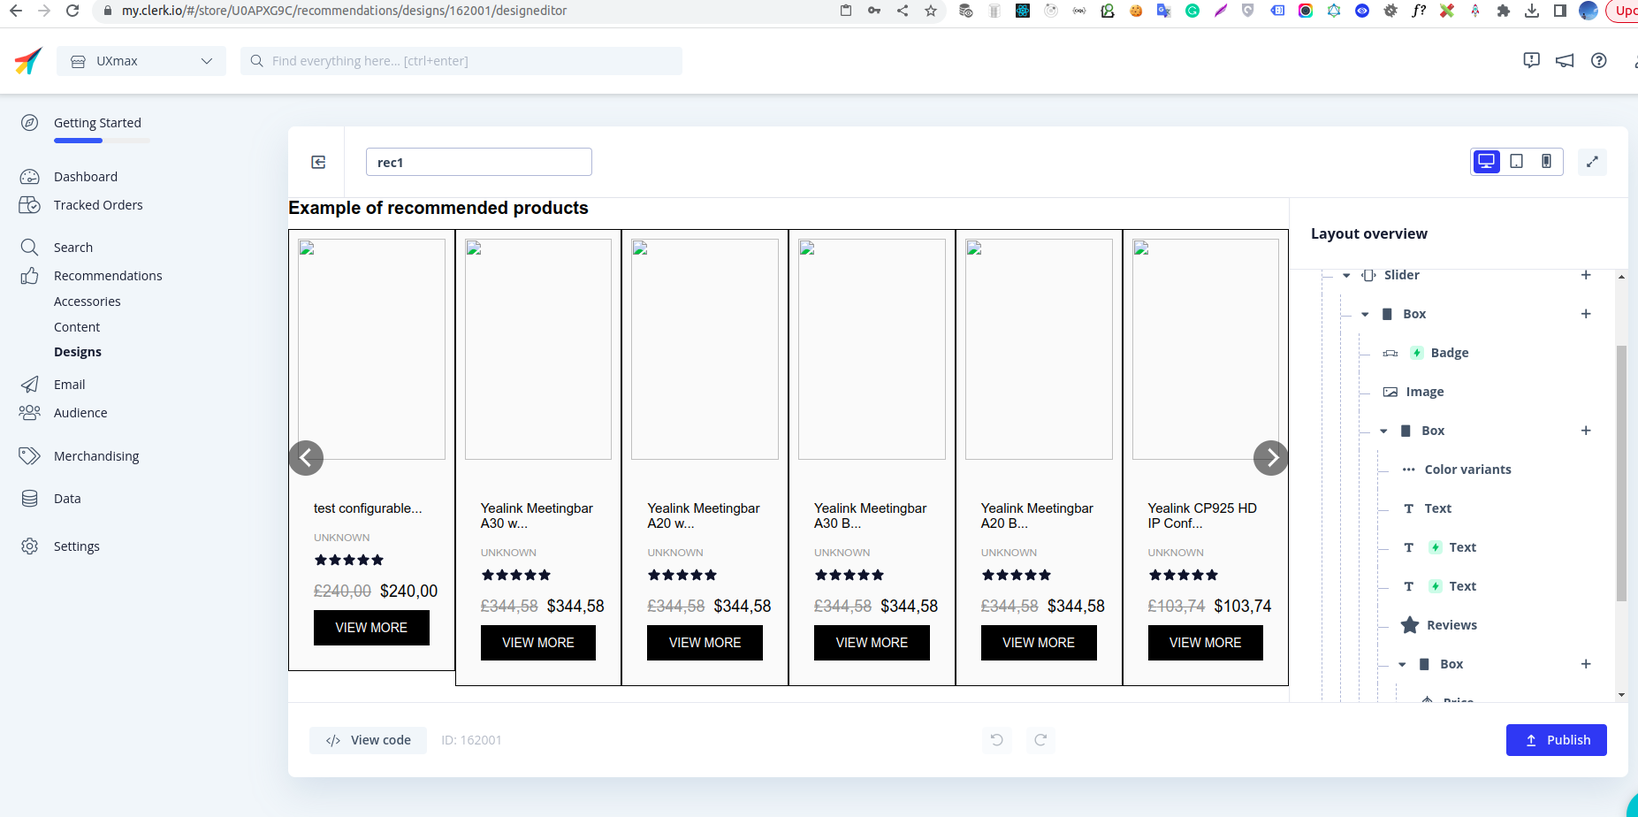
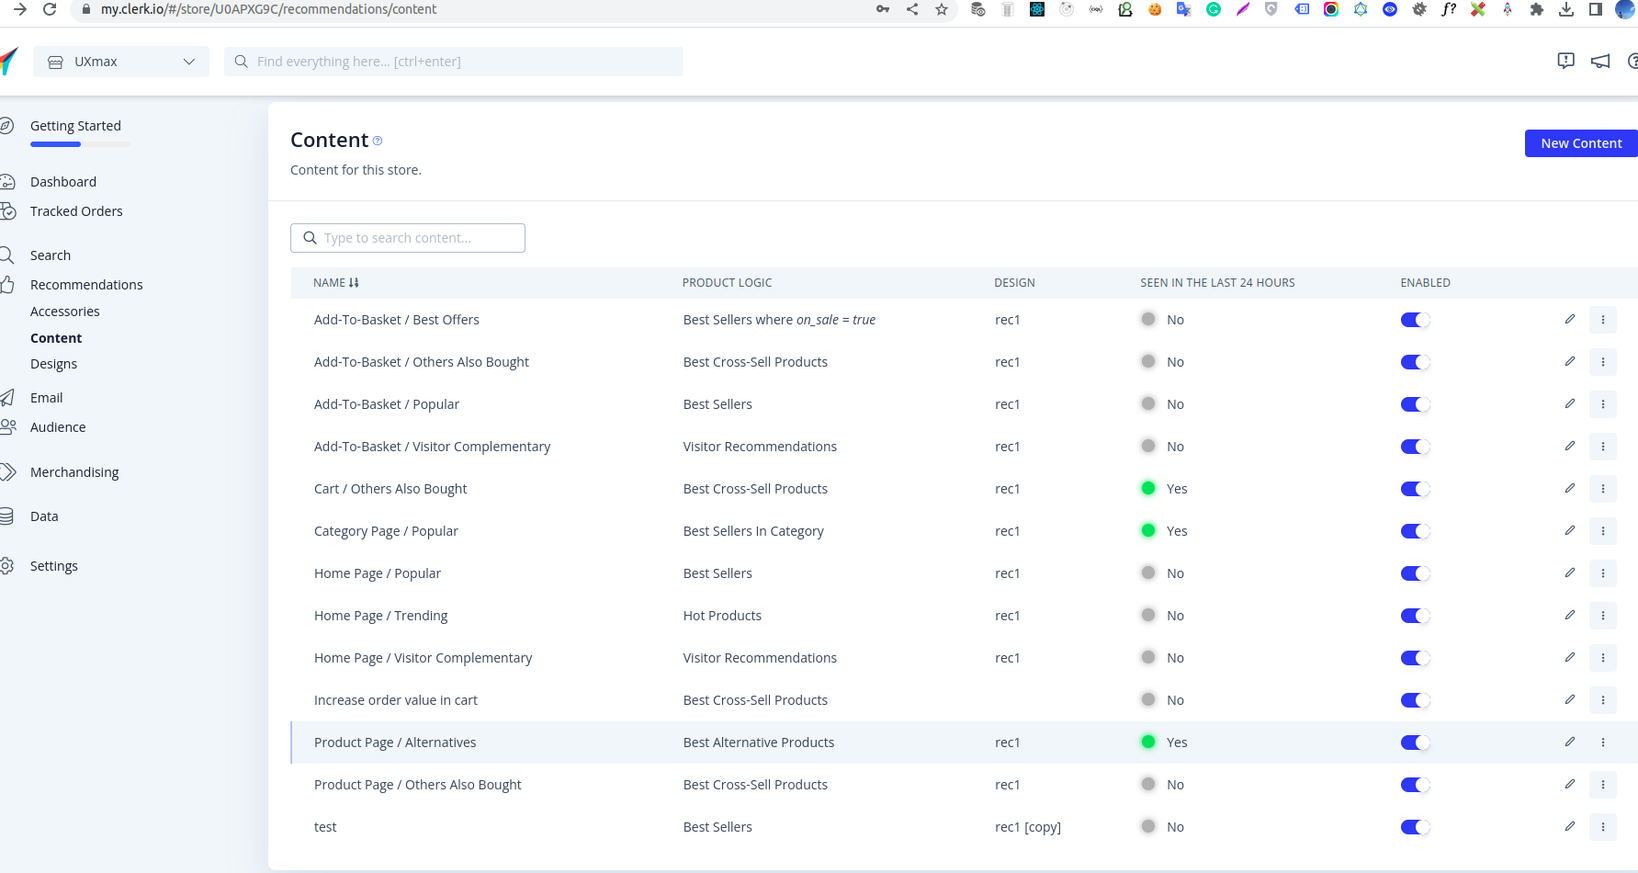
5. Set up and Configure the Recommendations Widget
Refer to the Getting Started with Recommendations on Magento 2 to:
- create recommendation sliders
- define widget contents
- configure content display through the Magento backend
6. Programmatically Display the Recommendations Widget
To programmatically show the recommendations widget on the cart, category, and product pages, you need to perform the following steps:
Create a module to retrieve the widget content configuration from the Magento backend.
- Define the configuration variables in the di.xml file.
- Create the schema.graphqls file with the required fields for API retrieval.
Develop an add-on for PWA to query the store configuration data and fetch the widget content.
- GraphQl query to retrieve store configuration data.
- Some custom hooks to query to Clerk API endpoint
https://api.clerk.io/v2?payload=to fetch the widget content data. - Extended components from the PWA core component, with programmatically targetable interceptors that call the custom hooks and insert content data based on the configuration.
- Some stylesheets to match with the current theme.
Related code:
<!-- Define the configuration variable in the di.xml file. -->
<type name="Magento\StoreGraphQl\Model\Resolver\Store\StoreConfigDataProvider">
        <arguments>
            <argument name="extendedConfigData" xsi:type="array">
                <item name="clerk_general_public_key" xsi:type="string">clerk/general/public_key</item>
                <item name="clerk_category_enabled" xsi:type="string">clerk/category/enabled</item>
                <item name="clerk_category_content" xsi:type="string">clerk/category/content</item>
                <item name="clerk_product_enabled" xsi:type="string">clerk/product/enabled</item>
                <item name="clerk_product_content" xsi:type="string">clerk/product/content</item>
                <item name="clerk_cart_enabled" xsi:type="string">clerk/cart/enabled</item>
                <item name="clerk_cart_content" xsi:type="string">clerk/cart/content</item>
            </argument>
        </arguments>
    </type>
//Create the schema.grapqls file
type StoreConfig {
    clerk_general_public_key: String @doc(description: "clerk public key")
    clerk_category_enabled: Boolean @doc(description: "clerk category content status")
    clerk_category_content: String @doc(description: "clerk category content class")
    clerk_product_enabled: Boolean @doc(description: "clerk product content status")
    clerk_product_content: String @doc(description: "clerk product content class")
    clerk_cart_enabled: Boolean @doc(description: "clerk cart content status")
    clerk_cart_content: String @doc(description: "clerk cart content status")
}
//GraphQl query for retrieving store configuration data.
export const GET_STORE_CONFIG_DATA = gql`
    query getStoreConfigClerk {
        # eslint-disable-next-line @graphql-eslint/require-id-when-available
        storeConfig {
            store_code
            clerk_general_public_key
            clerk_category_enabled
            clerk_category_content
            clerk_product_enabled
            clerk_product_content
            clerk_cart_enabled
            clerk_cart_content
        }
    }
`;
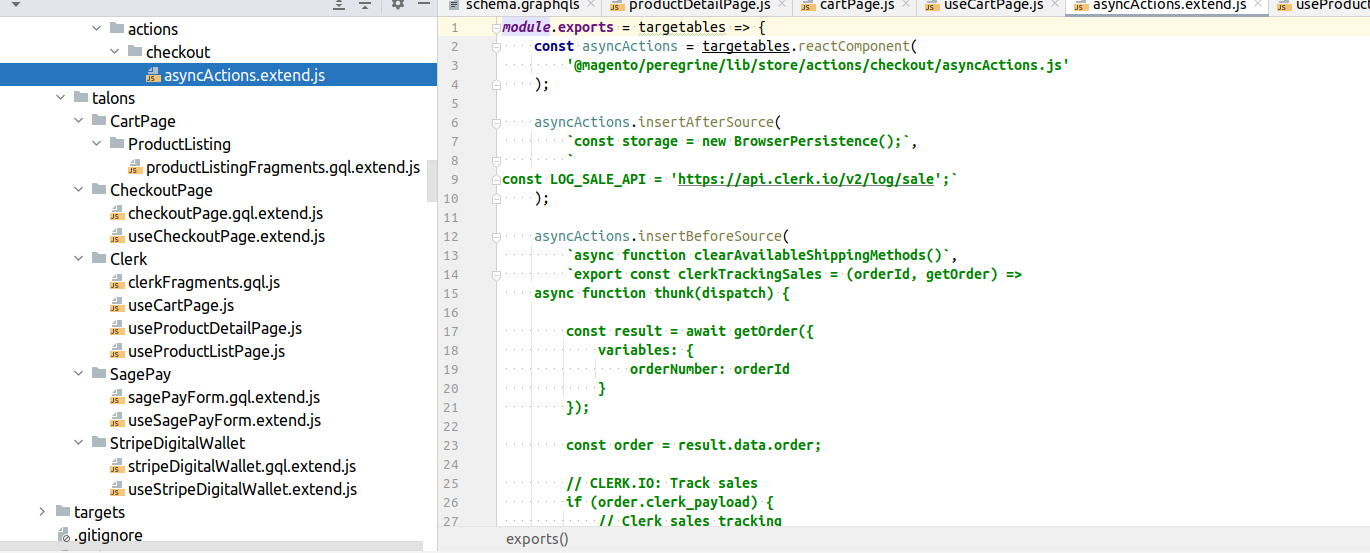
7. Enable Sales Tracking Programmatically
To implement sales tracking with Clerk.io in your Magento PWA, following the steps below:
- Create components and talons to extend the core Venia theme files and handle API calls for tracking sales to Clerk.io’s endpoint
https://api.clerk.io/v2/log/saleto clerk after an order is placed. - Extend theme files related to your payment methods, such as SagePay and Stripe, to incorporate sales tracking.
- Extend
@magento/peregrine/lib/store/actions/checkout/asyncActions.jsto integrate the necessary functionality.
By following these steps, you can successfully integrate Clerk.io with your Magento PWA and leverage its powerful features to enhance the shopping experience for your customers.
A Showcase Example
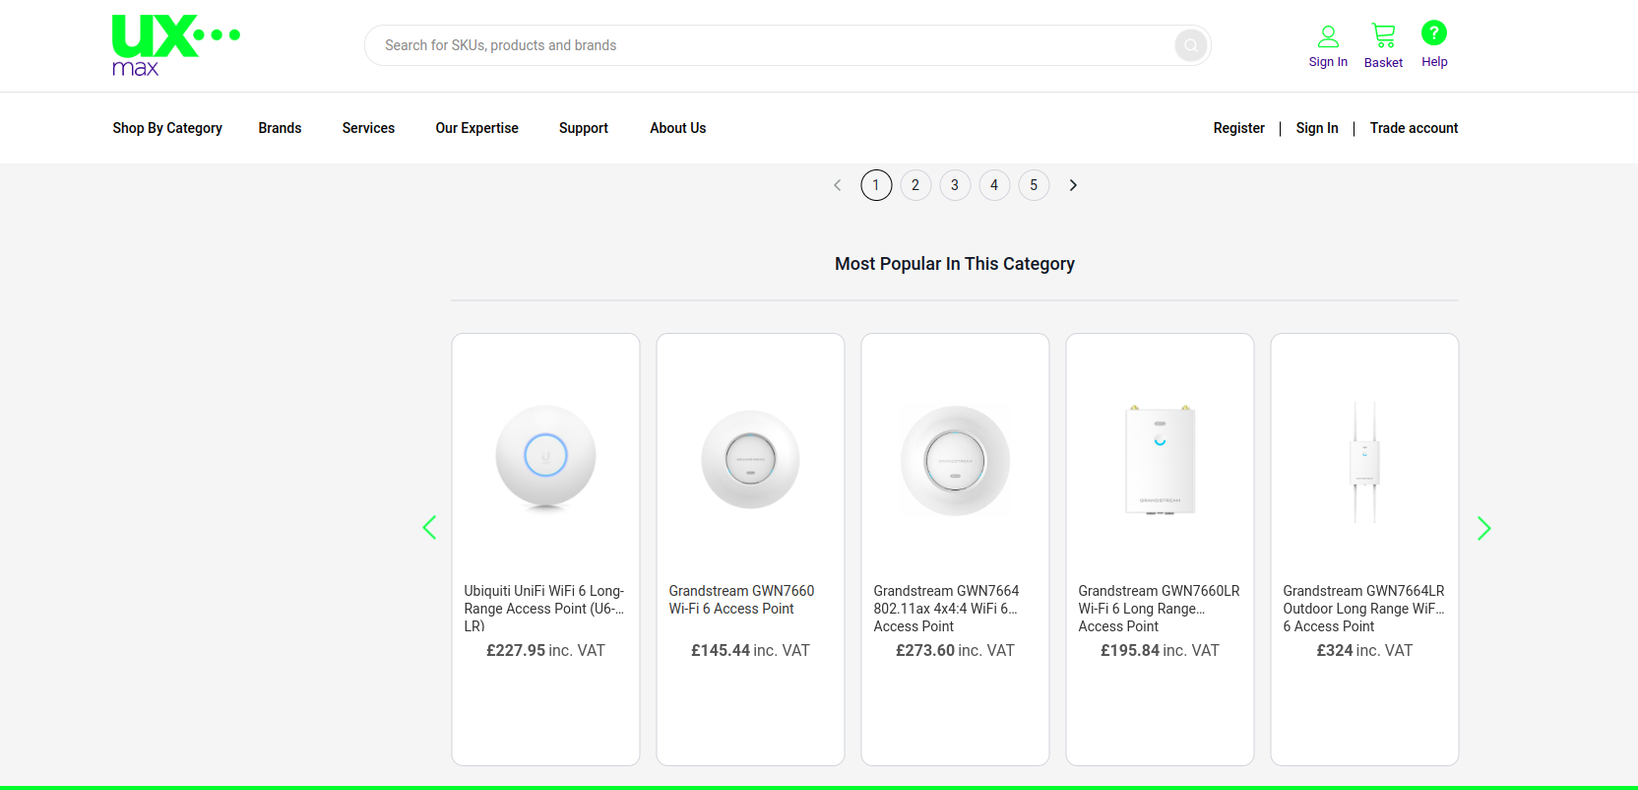
For a visual representation of the Clerk.io integration in action, visit our demo site.
- Category Page
- Product Page
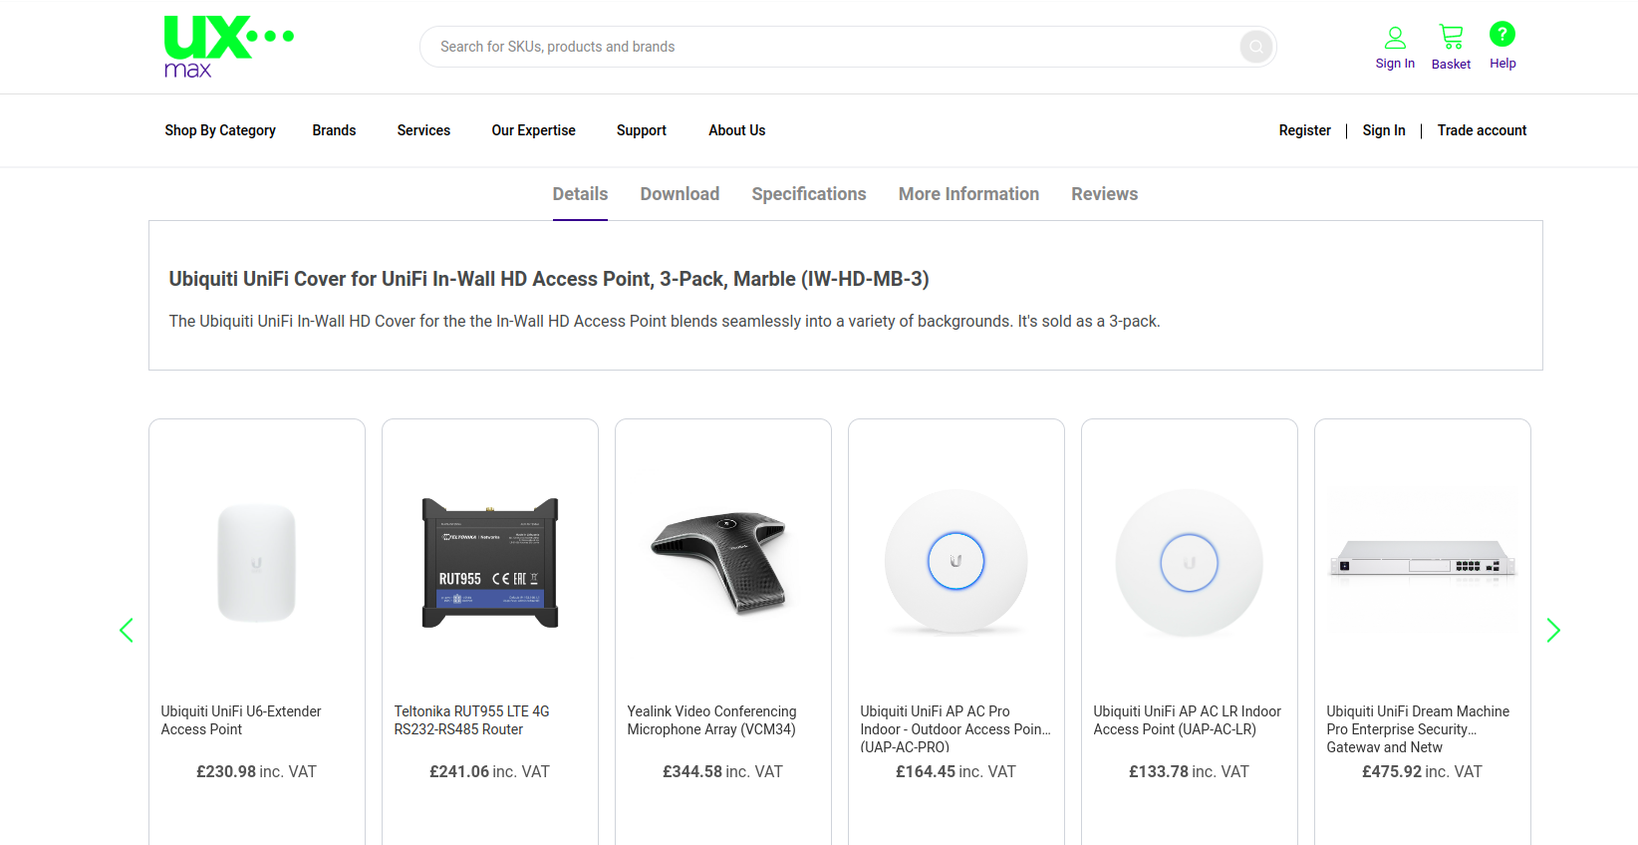
- Shopping Cart Page
- Sales tracking
Final Words
Integrating Clerk.io with Magento PWA offers powerful benefits for your online store. By following the provided steps, you can seamlessly implement Clerk.io and enjoy personalized recommendations and effective sales tracking.
If you encounter any challenges during the integration process or prefer to have experts handle it for you, the Tigren team is here to help. With over 5 years of experience in Magento PWA development, we have in-depth knowledge and expertise to assist you. Whether you need to build a powerful Magento PWA from scratch, utilize a Magento PWA theme, or integrate it with third-party software, our team is ready to provide tailored solutions to meet your specific requirements.
Don’t hesitate to reach out to the Tigren team for expert assistance in maximizing the potential of your Magento PWA and ensuring a seamless integration with Clerk.io.
Related Posts:
Cannot Preview A Campaign In Magento PWA Content Staging? Here’s How To Fix It

