In this dynamic e-commerce landscape, standing out is not just a desire, but a necessity for businesses to thrive. Your logo is the visual gateway to your identity, and changing an impressive logo in Magento 2 can leave an indelible mark on your customers.
Today, we will guide you through the process of changing your logo in Magento 2 in just 5 minutes. With Magento 2 as your canvas, your logo will be more than just a design – it will be a reflection of your values, aspirations, and unique offerings. So, let’s get ready to empower your online business and elevate your business to new heights.
How To Change The Logo In The Header?
Step 1: Logo preparation
If you don’t know exactly the logo size in the header, you have to open the page in a browser, right-click the logo image.

Then, click on “Inspect element”.
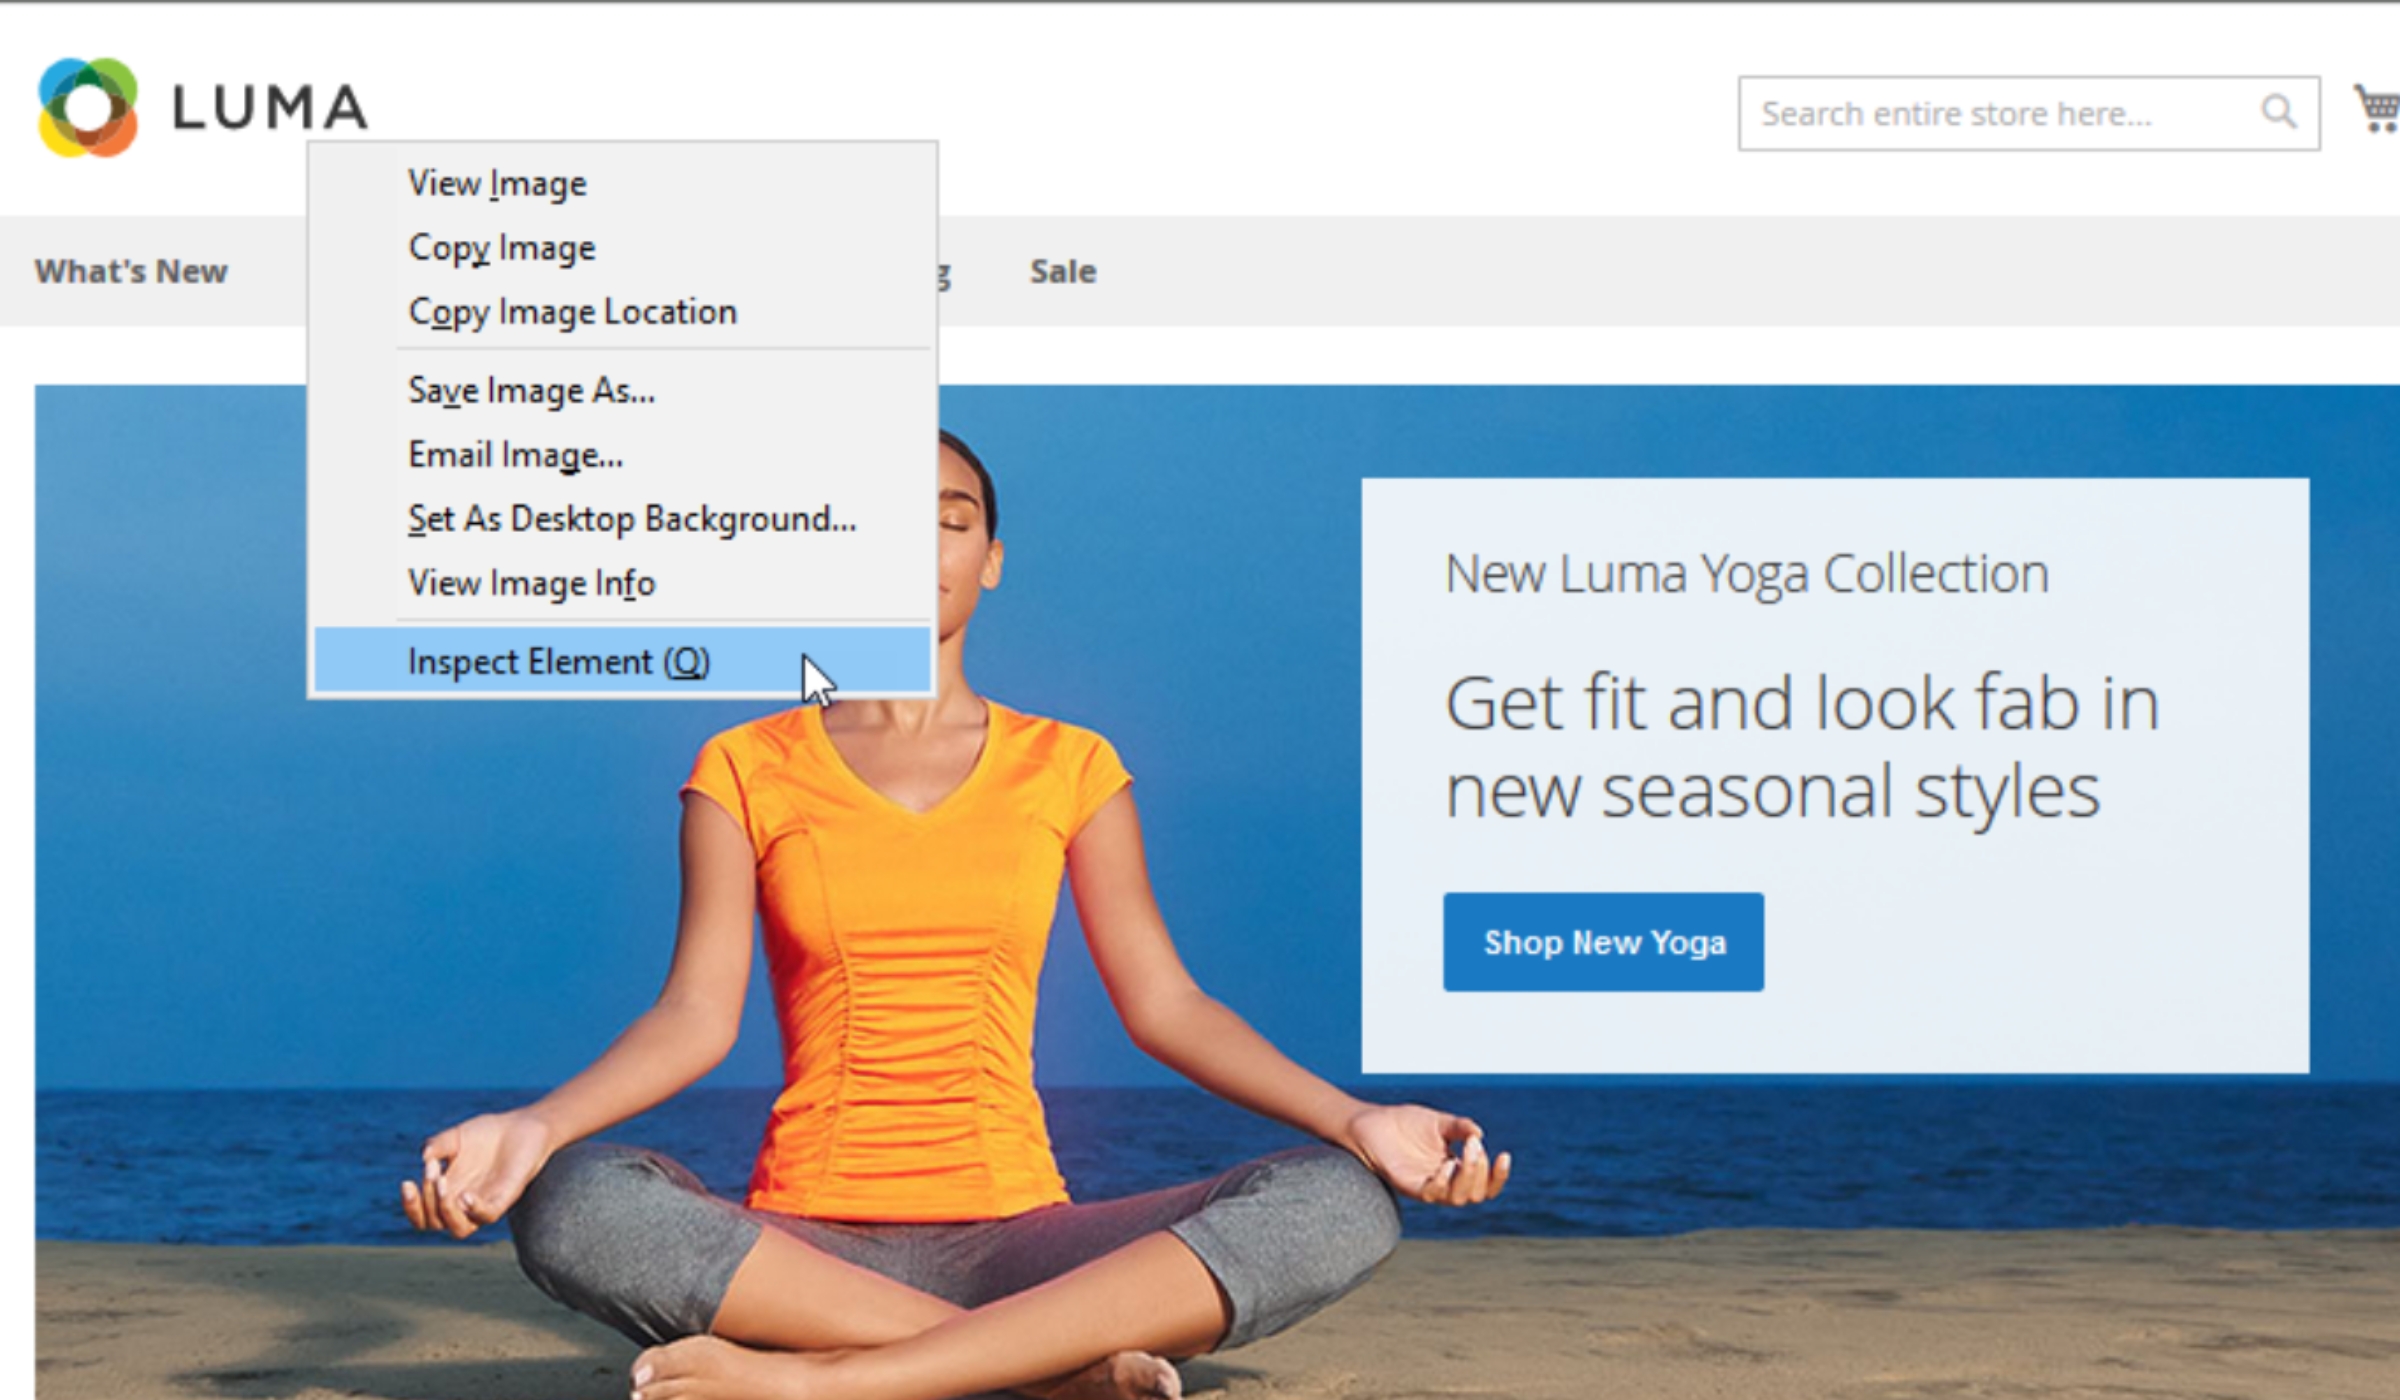
However, the size of the logo in the header also depends on your theme.
In terms of the file type, you can use a logo that is saved as either a GIF, PNG, JPG, or SVG.
Step 2: Upload FrontEnd Logo in Magento 2
Go to the admin panel, navigate to STORES, and choose Configuration
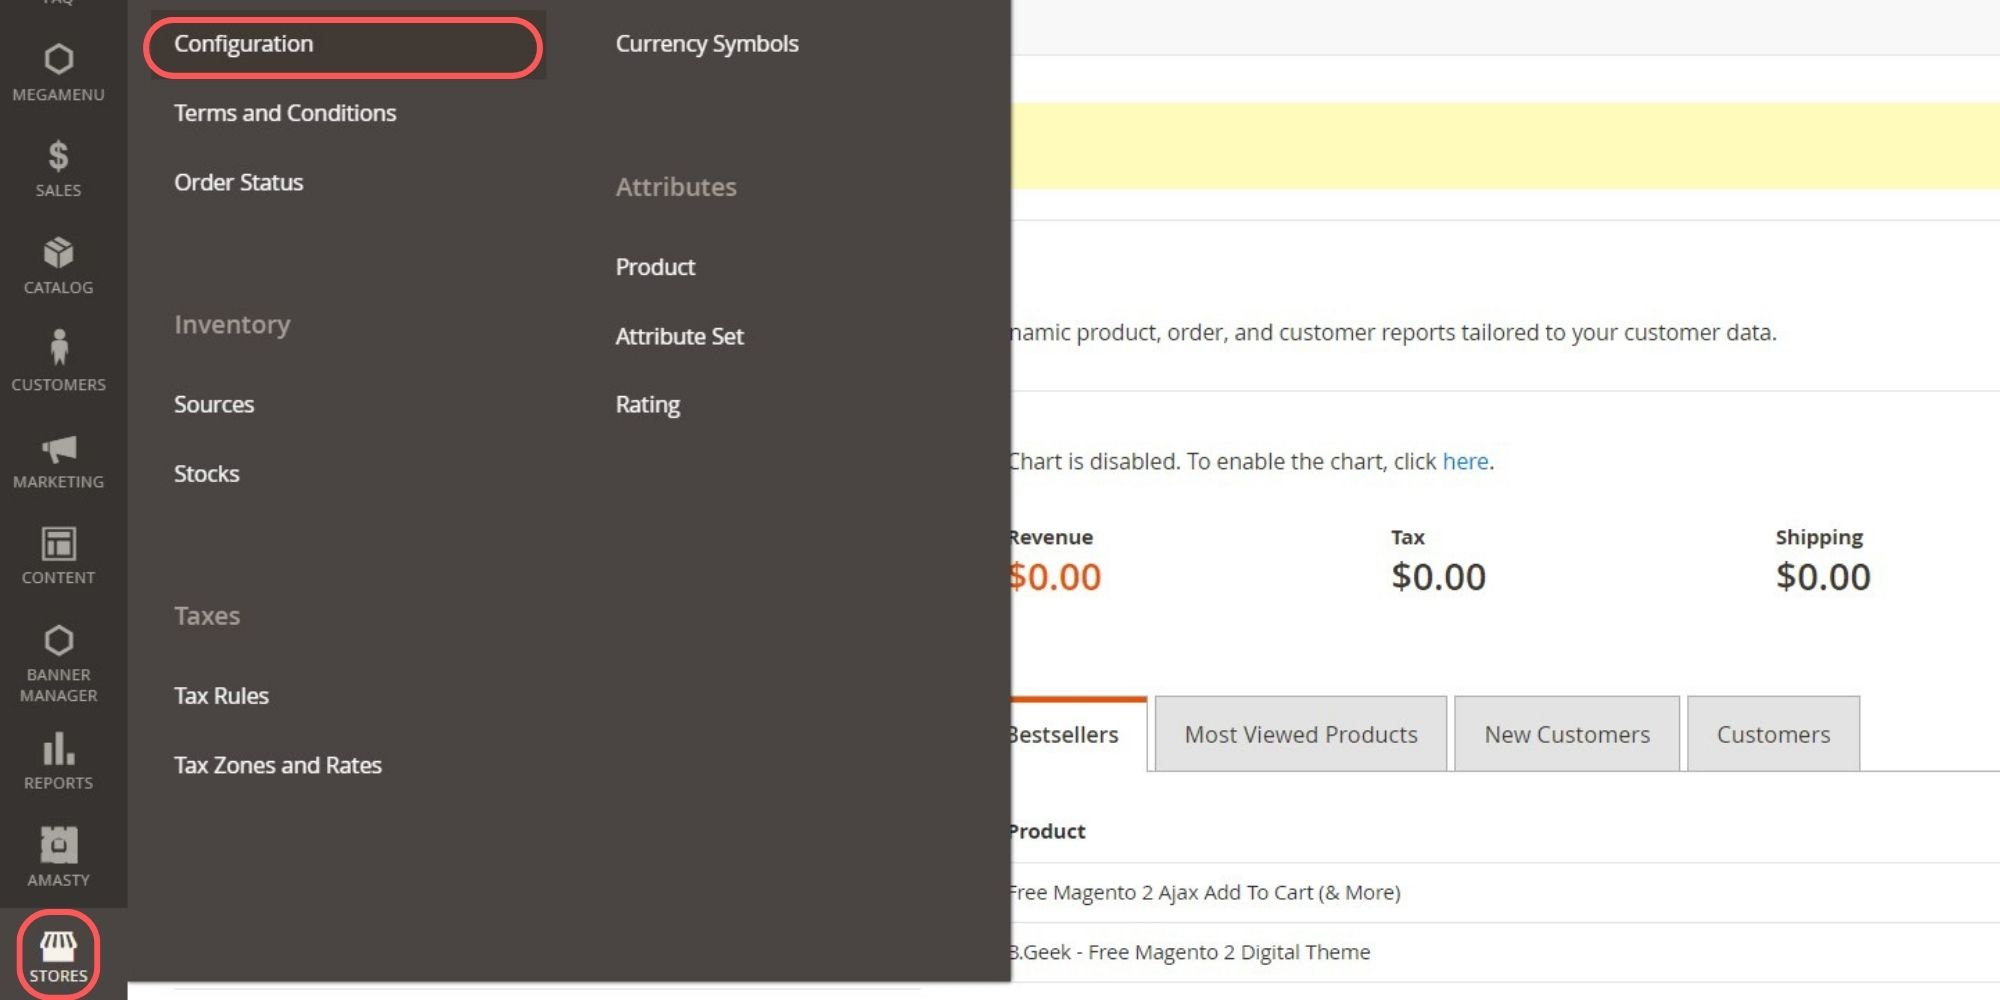
Choose Design under the category General
Choose the store view that you want to change the logo by setting Store View.
Next, expand the “Header” section.
- For Magento 2.1, navigate to Content -> Configuration, then select your Theme
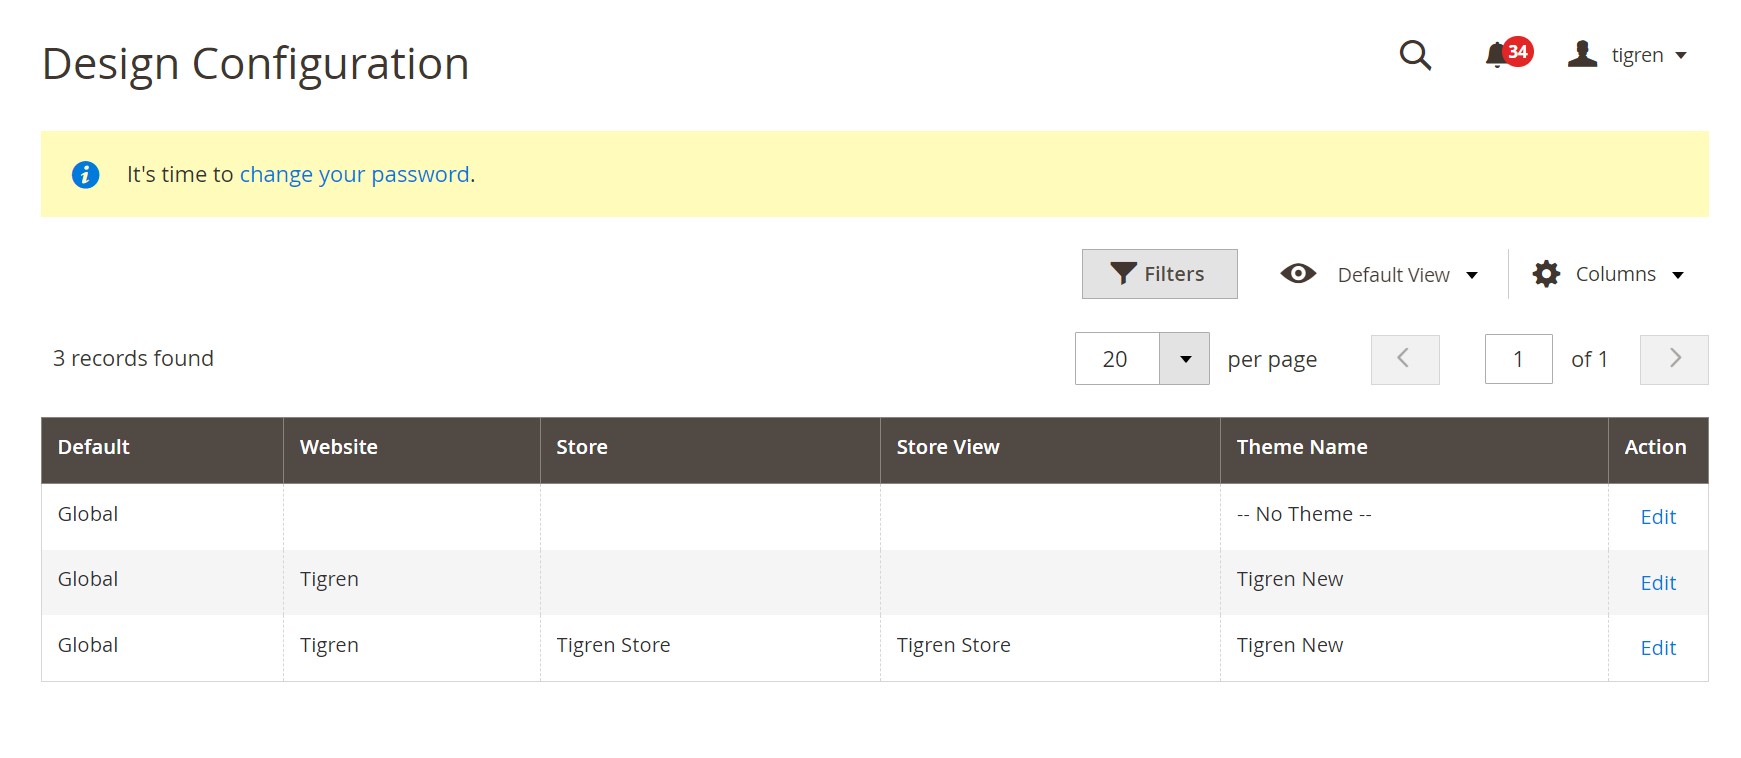
- For Magento 2.2 and higher, go to Content -> Design Configuration
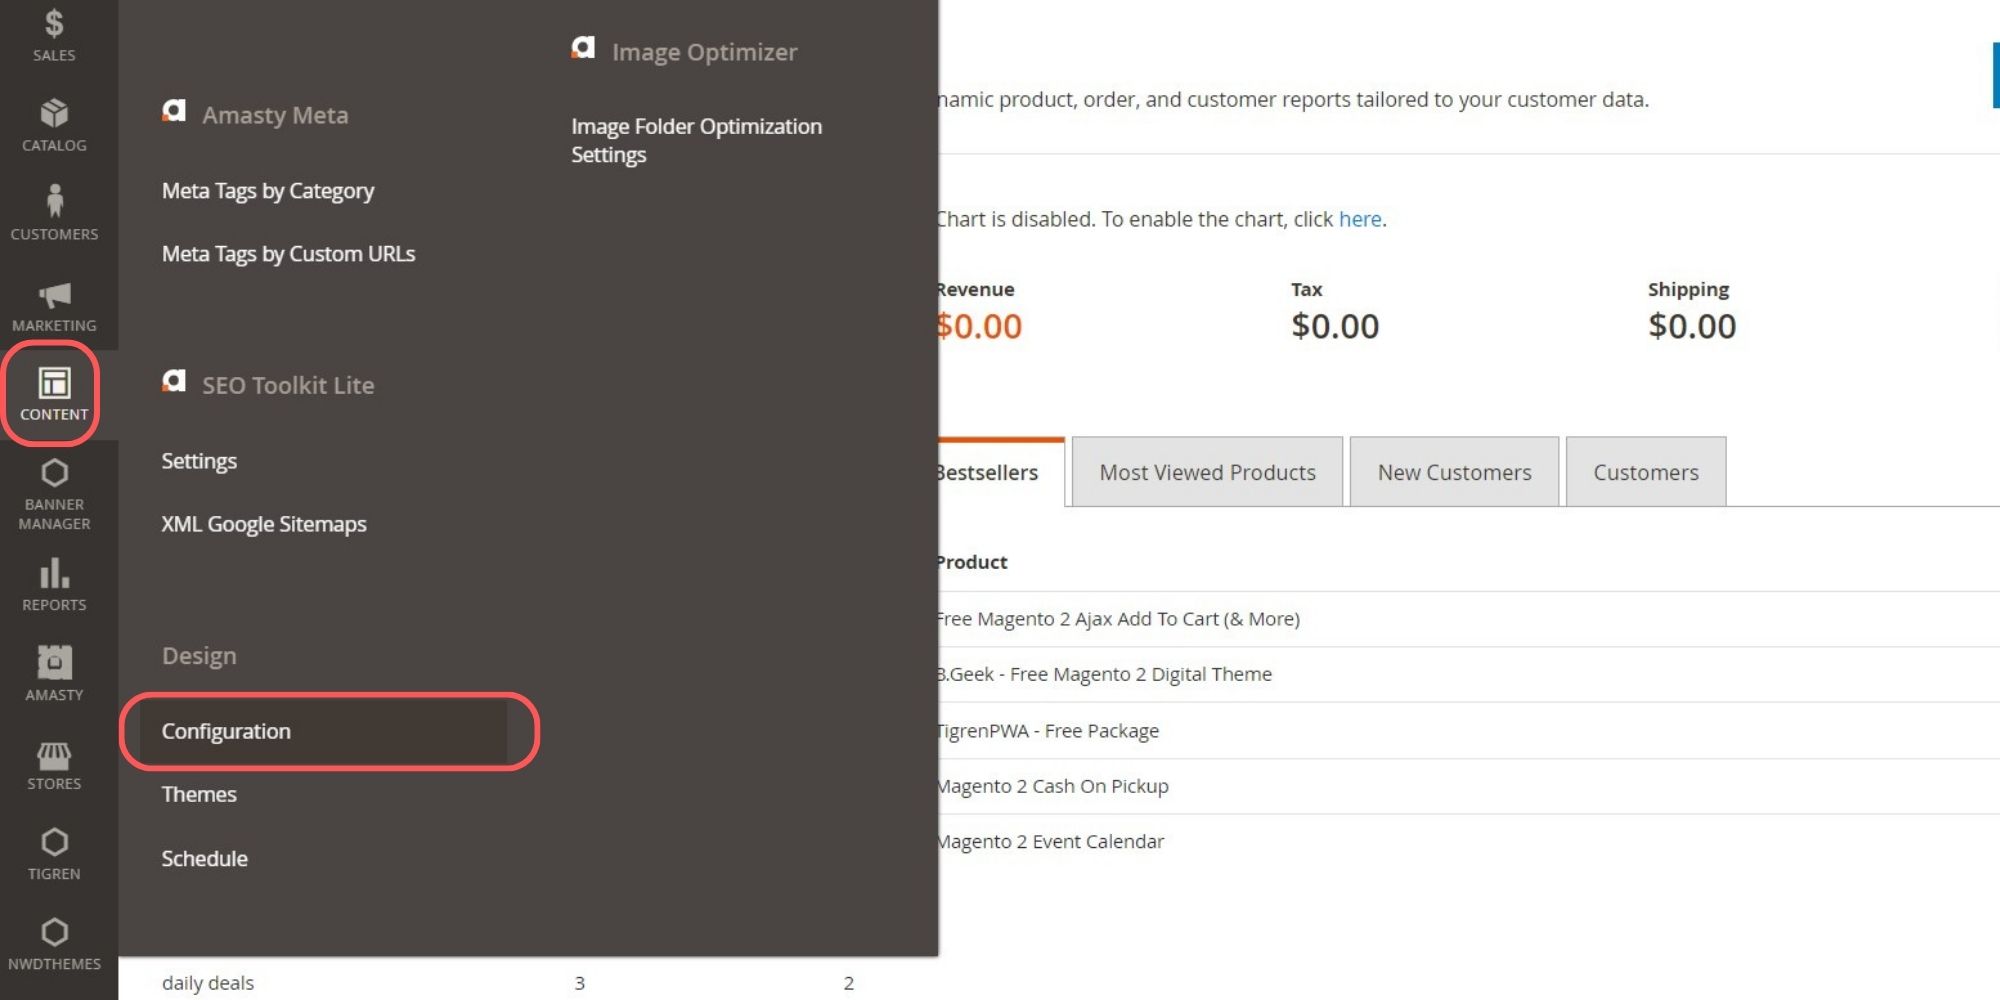
Here, click Edit and expand the Header section. You can upload a new logo in the header from your computer.
Then, remember to enter that logo width and height as well as the logo image alt.
Step 3: Save And Check The Result
Save the configuration to complete.
2. How To Change Logo In The Transactional Emails & PDF Invoices?
Logo preparation
Transactional Emails
Similar to the header logo, you can use a logo that is saved as either a GIF, PNG, JPG, or SVG file type.
It’s worth noting that the size of your email logo must triple that of the header template in order to display that logo nicely on high-resolution devices.
We highly recommend you crop the image to discard all wasted space either at the top or bottom while still maintaining the original aspect ratio of the logo.
PDF Invoices
The most important notice is that the invoice logo must be rendered to fit a space that is 200 pixels wide by 50 pixels high.
Unlike the email logo, you can resize the invoice logo to fit the height without concern about any unused space to the right.
Upload the logo in the email and PDF invoices
After setting the Store View the same as Upload Logo in the header, follow these guides
Transactional Emails
First, expand the “Transactional Emails” section.
Here, you can upload a new logo in the email from your computer. Then, remember to enter that logo width and height as well as the logo image alt.
After that, you also need to select the Header and Footer Template.
Save the configuration to complete.
PDF Invoices
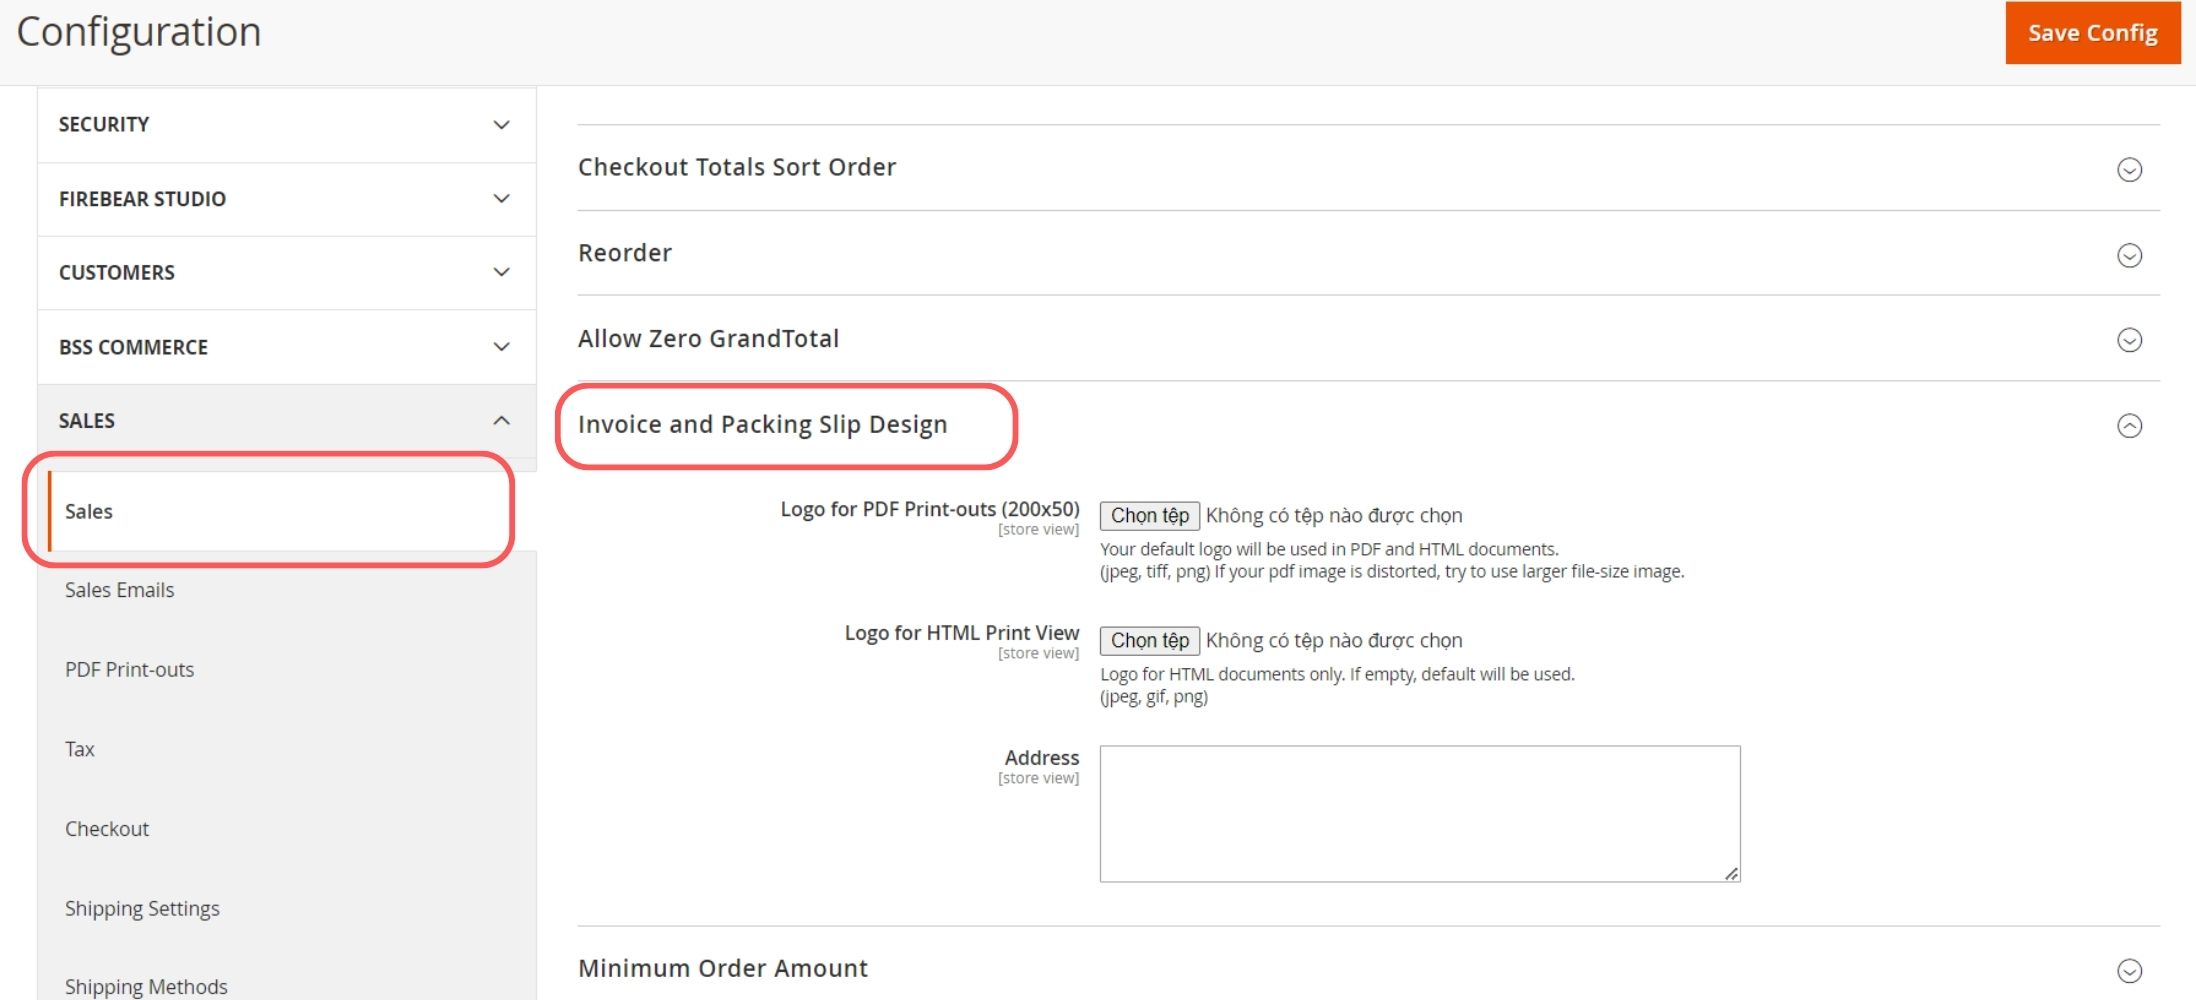
First, you have to expand the “SALES” section on the left menu and choose “Sales”.
Second, you need to expand the “Invoice and Packing Slip Design” section.
Third, now you can upload the logo for the invoice.
Remember to save the configuration to complete.
Troubleshooting Issues
Unable to create directory
This error message indicates that the Magento application does not have sufficient permissions to create directories in the specified path, specifically in the MAGENTO_DIR/pub/media directory. This issue often occurs during file uploads when Magento needs to create new directories to store uploaded files. To fix this problem, you need to grant appropriate permissions to the pub/media directory.
Logo is not shown on the frontend
- Cache problem: You should check the cache first, when problems like this happen. Consider clearing Magento cache to upload logo successfully.
- Theme problem: Uploader issue in Magento 2.3.0 might be due to the theme developer’s missing implementation of Magento functionality, resulting in a hardcoded solution. Contact the theme developer for a fix or consider implementing Magento’s uploader functionality manually. Test changes in a staging environment first.
We have shown you how to change the logo in the header, the transactional emails, and the invoice in Magento 2. If you have any problems when following these instructions, please leave a comment below then we can help!
Read More:

