In many cases, you would like to customize the Magento email templates to suit your business better and even make you stand out in the market. If all Magento stores use the identical email templates of Magento and send them to the customers, how boring it would be, right?
In this guide, we will show you clearly how to change/ edit/ customize the email template content in Magento 2 email settings. It takes you only a few minutes to do this directly in the Magento admin panel.
Step 1: Load the default email templates
You can customize a Magento 2 email template from your Magento admin panel by following the steps below:
1.1. First, you must log in to the Admin Panel, navigate to the MARKETING section in the sidebar, and then choose the Email Templates.
(Admin Panel => MARKETING => Email Templates)

1.2. Click on Add New Template button

This will help you create a new email template.
1.3. Select the template you want to customize among the available templates Magento provides, then click on the Load Template button.

Step 2: Complete the template information
2.1. The chosen template will be loaded and the Template Subject and Template Content fields will be automatically filled. Customize the email template content as you want. You can set a new name for the email template, modify the Template Subject, edit the Template Content, and add more Template Styles.

2.2. It’s worth noting that you can insert multiple variables into the Template Content such as the store name, store hours, zip/ postal code, billing address, shipping address, and so on.

2.3. Finally, remember to save the template you’ve just created.
Step 3: Assign the email template
Once creating a new email template, you must assign it to the store configurations in the user interface.
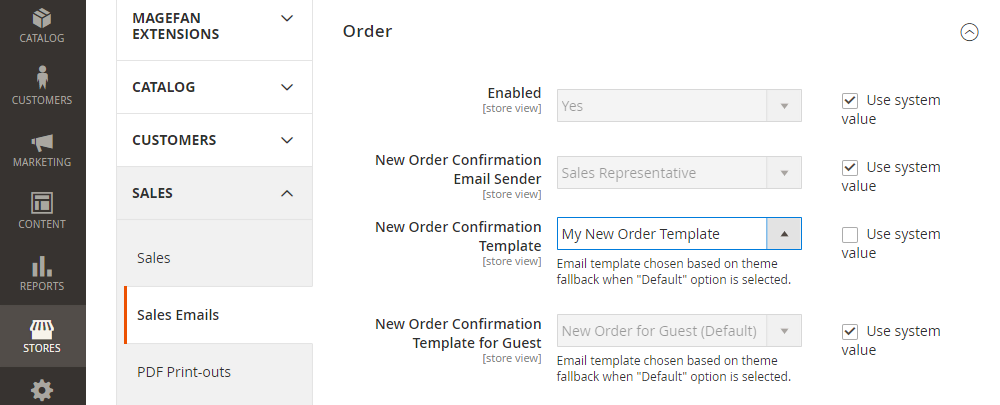
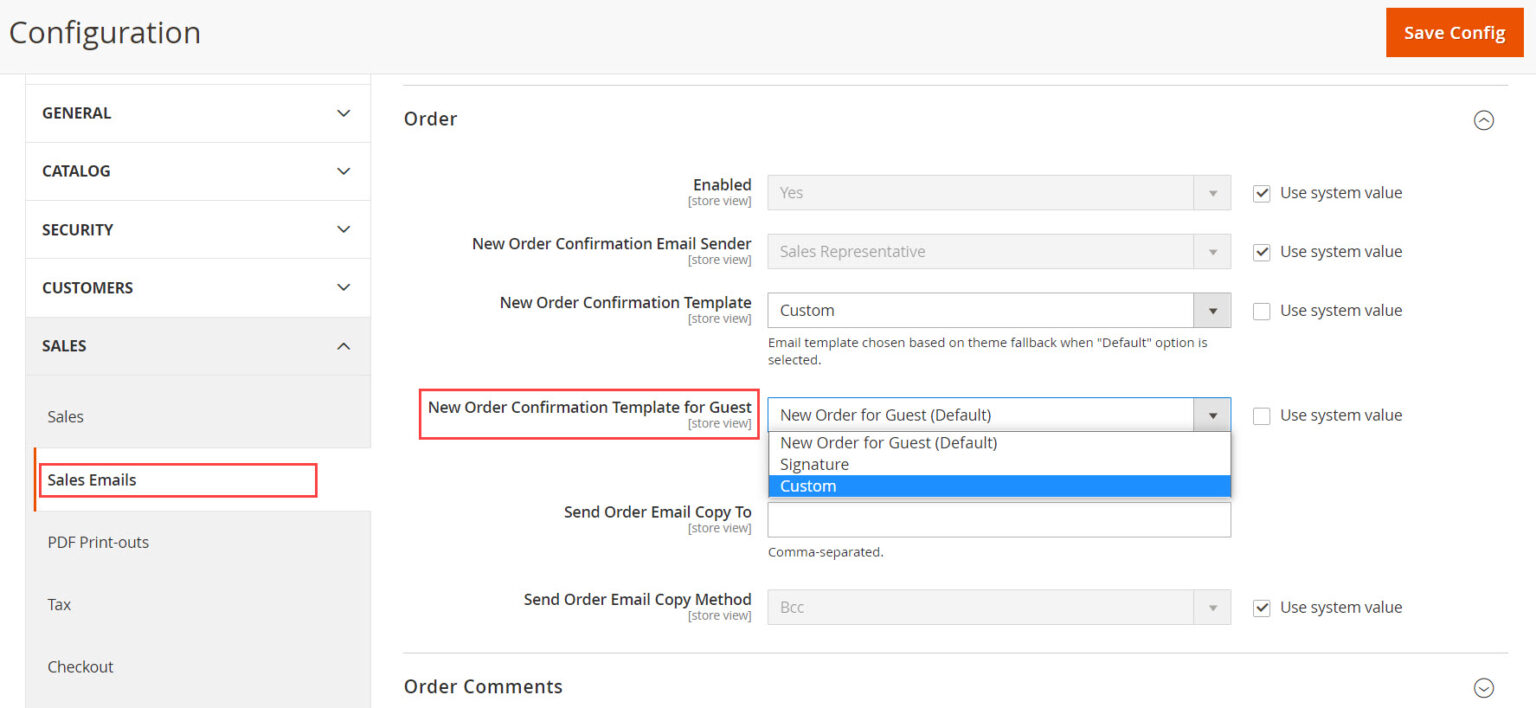
3.1. Navigate to Stores > Setting > Configuration > Sales > Sales Emails.
3.2. Remove the checkmark Use System Value on the right side of the New Order Confirmation Template field.

3.3. Select your email template in the New Order Confirmation Template dropdown

3.4. Save the Configuration and flush the Magento caches
Step 4: Customize the email logo
After creating the email template and assigning it to the store configurations, you need to customize the email logo.
4.1. Go to Content > Design > Configuration and choose the suitable configuration scope

4.2. Click on the Transactional Emails section tab. Then, you can fill out the other fields per your requirements.

- Upload your logo into the Logo Image field. You can upload the Logo Image or Select from the Gallery of already uploaded images.
- Set the Logo Image Alt
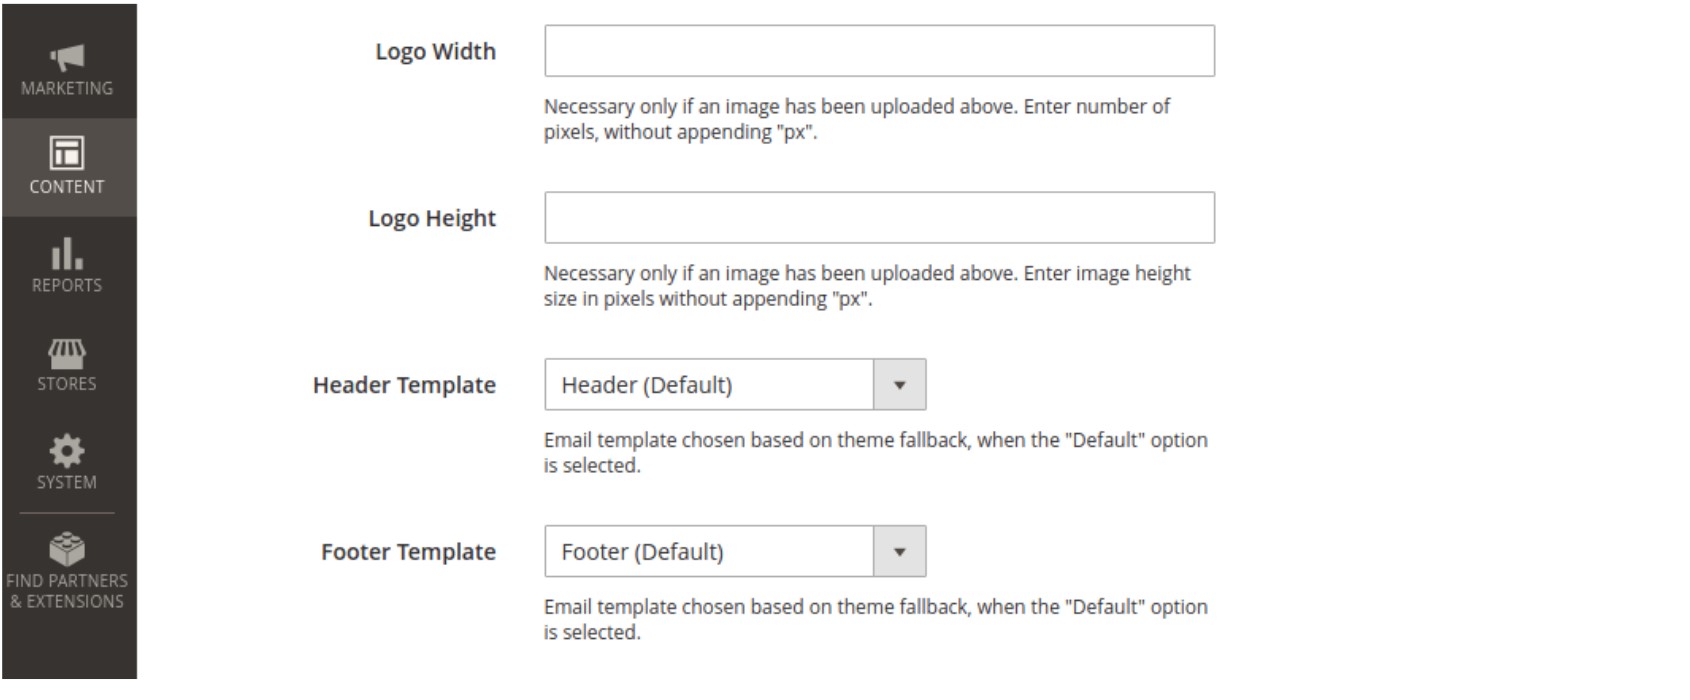
- Enter the Logo Width and Height
- Choose the Header and Footer Templates.
4.3. Click on the Save Configuration button to reflect the changes.
Wrap Up
By following this guide, you can personalize your email templates, and deliver a cohesive and branded experience to your customers, reinforcing your store’s professionalism and attention to detail.
Remember to thoroughly test your modified email templates to ensure they display correctly and contain the desired information. This will help you avoid potential issues and guarantee that your customers receive clear and visually appealing transactional emails.
In conclusion, with the ability to change email templates in Magento 2, you can create a unique and engaging communication channel that leaves a lasting impression on your customers. Customizing these email templates allows you to align your email communications with your brand and provide a seamless experience throughout the customer journey.
Related Posts:
How To Change The Logo In Magento 2
How To Create A Virtual Product In Magento 2?
How To Set Up Currencies In Magento 2?

