
Magento (Adobe Commerce) has emerged as a leading platform for building and managing online stores. Its robust features, scalability, and flexibility have made it a popular choice for businesses of all sizes.
However, launching a Magento store can be a complex process, often involving a multitude of technical considerations and intricate configurations.
This is where a comprehensive go-live checklist becomes essential. A well-structured checklist can serve as a roadmap, guiding you through the intricacies of launching your Magento 2 store and ensuring that every aspect is adequately addressed.
This blog provides you with a comprehensive Magento 2 go-live checklist, addresses the key areas that require attention before, during, and after launching your store. By following this checklist, you can minimize the risk of encountering unforeseen challenges and ensure a smooth and successful go-live experience.
Pre-Go live
The Pre-go live phase is one of the most important steps in launching your Magento store. This is when you will make sure that your store is ready to go live and that you have taken all of the necessary steps to ensure a smooth launch.
Ensure you are using the latest Magento 2 version

Maintaining your Magento store’s software up-to-date is crucial for optimal performance and security. Operating an outdated version leaves your store vulnerable to potential exploits and may result in compatibility issues with extensions and themes. To ensure a smooth and secure experience, it’s essential to regularly check for available Magento updates and promptly apply them.
Additionally, staying current with the latest Magento version provides access to new features and enhancements that can improve your store’s functionality, user experience, and overall competitiveness. By embracing the latest innovations, you can stay ahead of the curve and provide a more engaging and rewarding experience for your customers.
Verify that your system meets the minimum requirements
Before embarking on your Magento journey, it’s imperative to ensure your system meets the minimum requirements specified by Magento. These requirements outline the hardware and software specifications necessary to run Magento successfully. Failure to meet these requirements can lead to performance issues, stability problems, and potential data loss.
To verify compliance, carefully review Magento’s official system requirements documentation. This documentation provides detailed information on the minimum PHP version, memory requirements, disk space requirements, and other essential parameters. By ensuring your system meets these requirements, you lay a solid foundation for a reliable and scalable Magento experience.
Configure SSL certificate

Protecting your customers’ sensitive information is paramount in the e-commerce realm. An SSL certificate plays a critical role in safeguarding data transmissions between your store and your customers’ browsers. By encrypting this communication, you prevent unauthorized access to sensitive information such as credit card details and personal data.
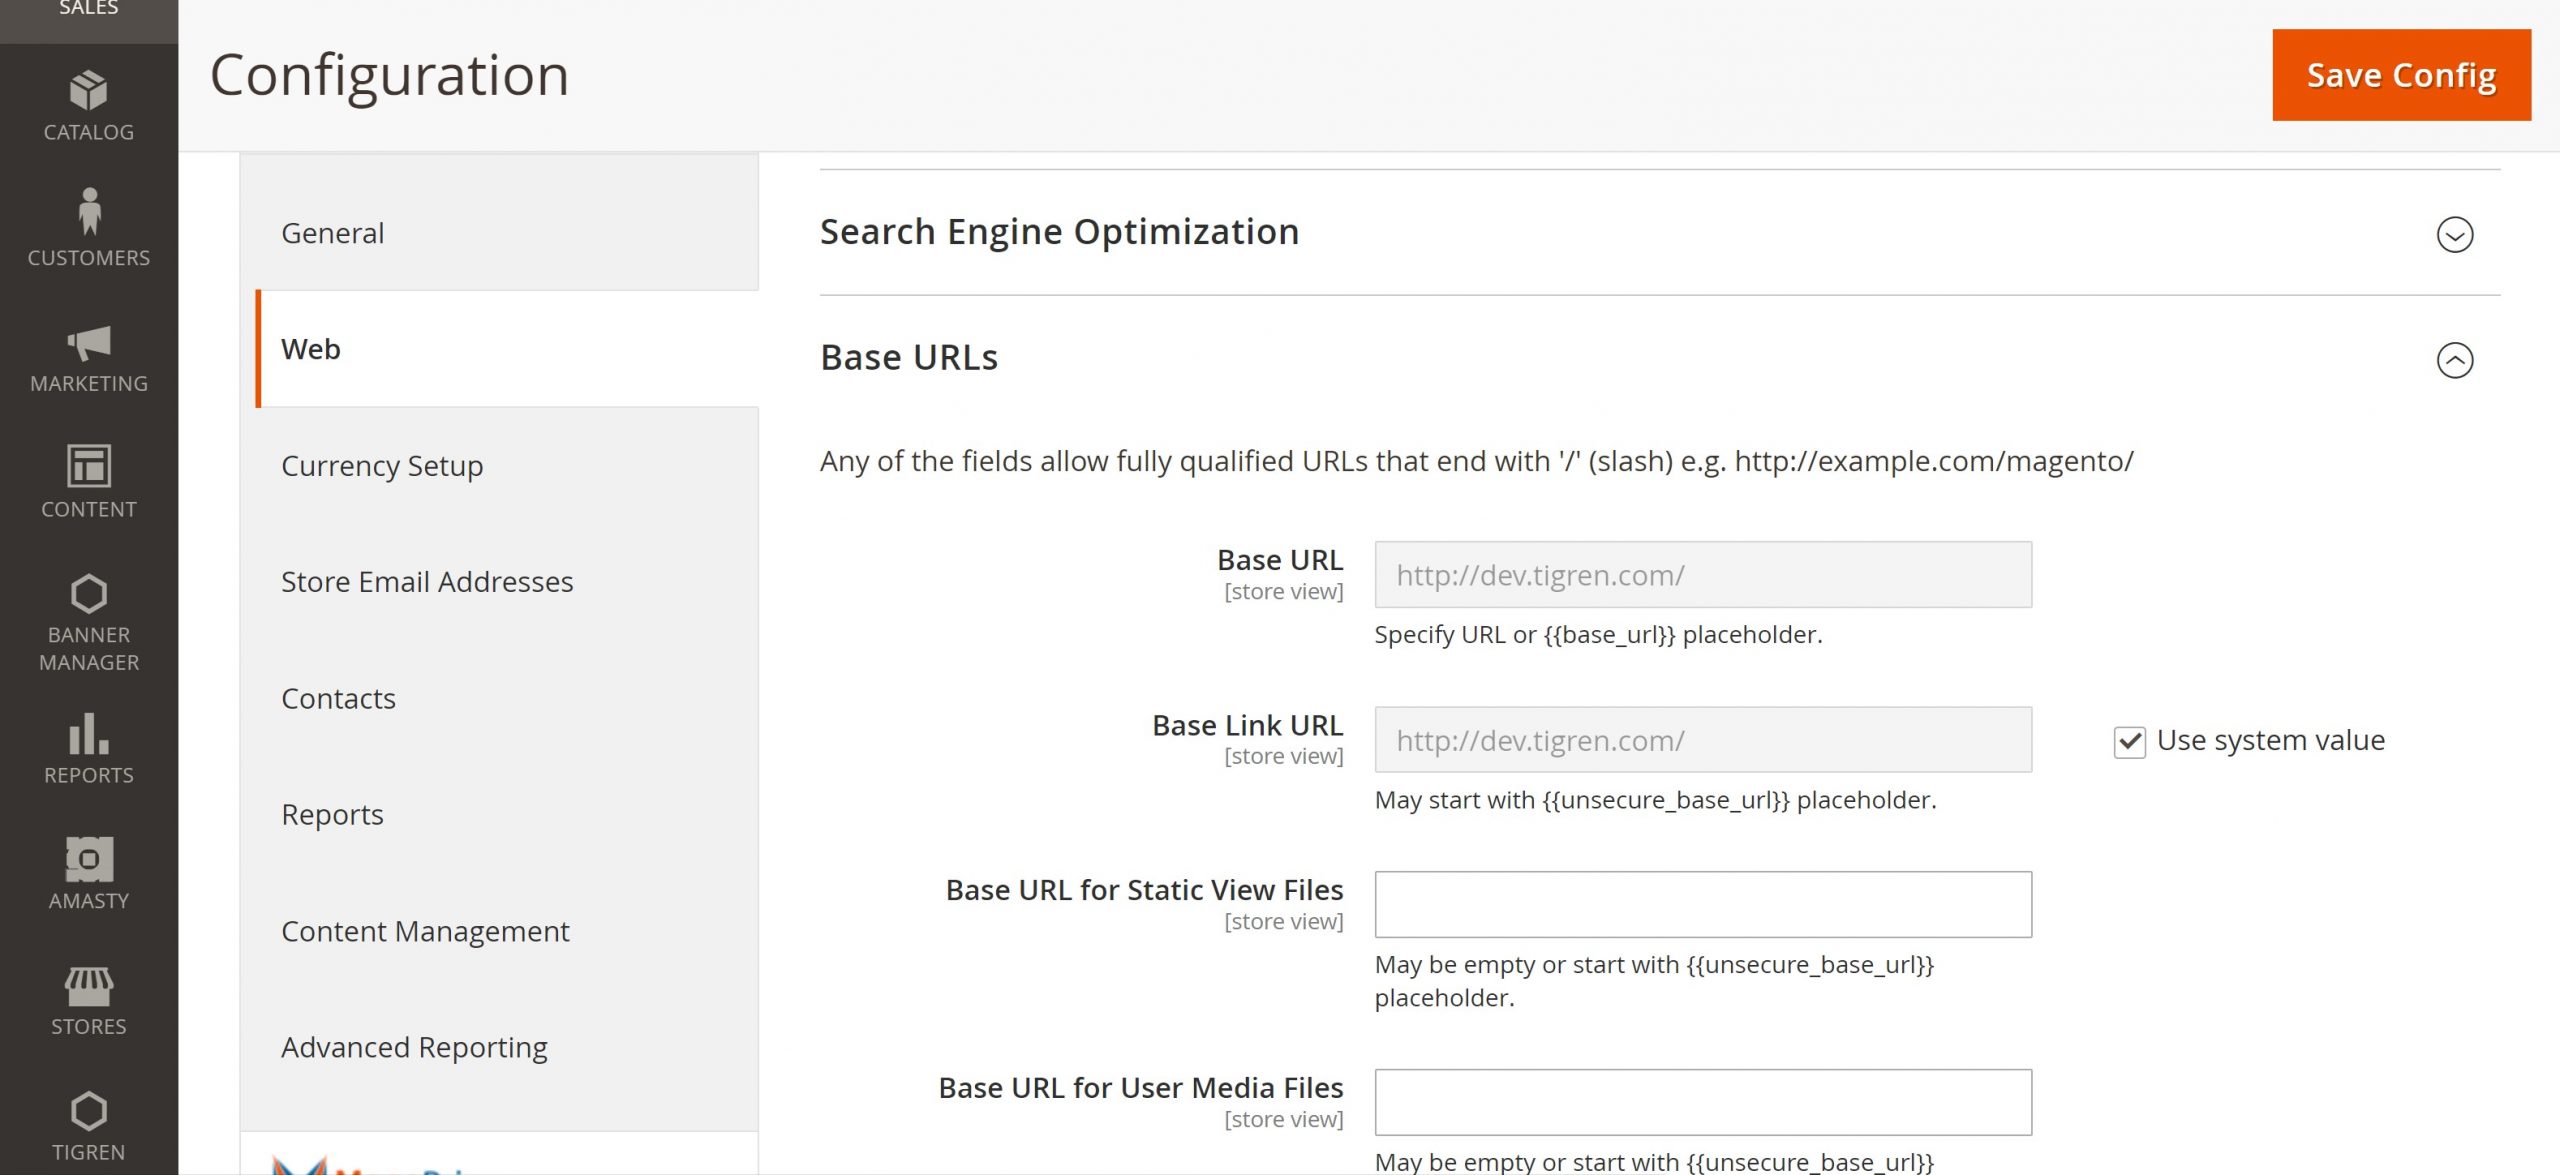
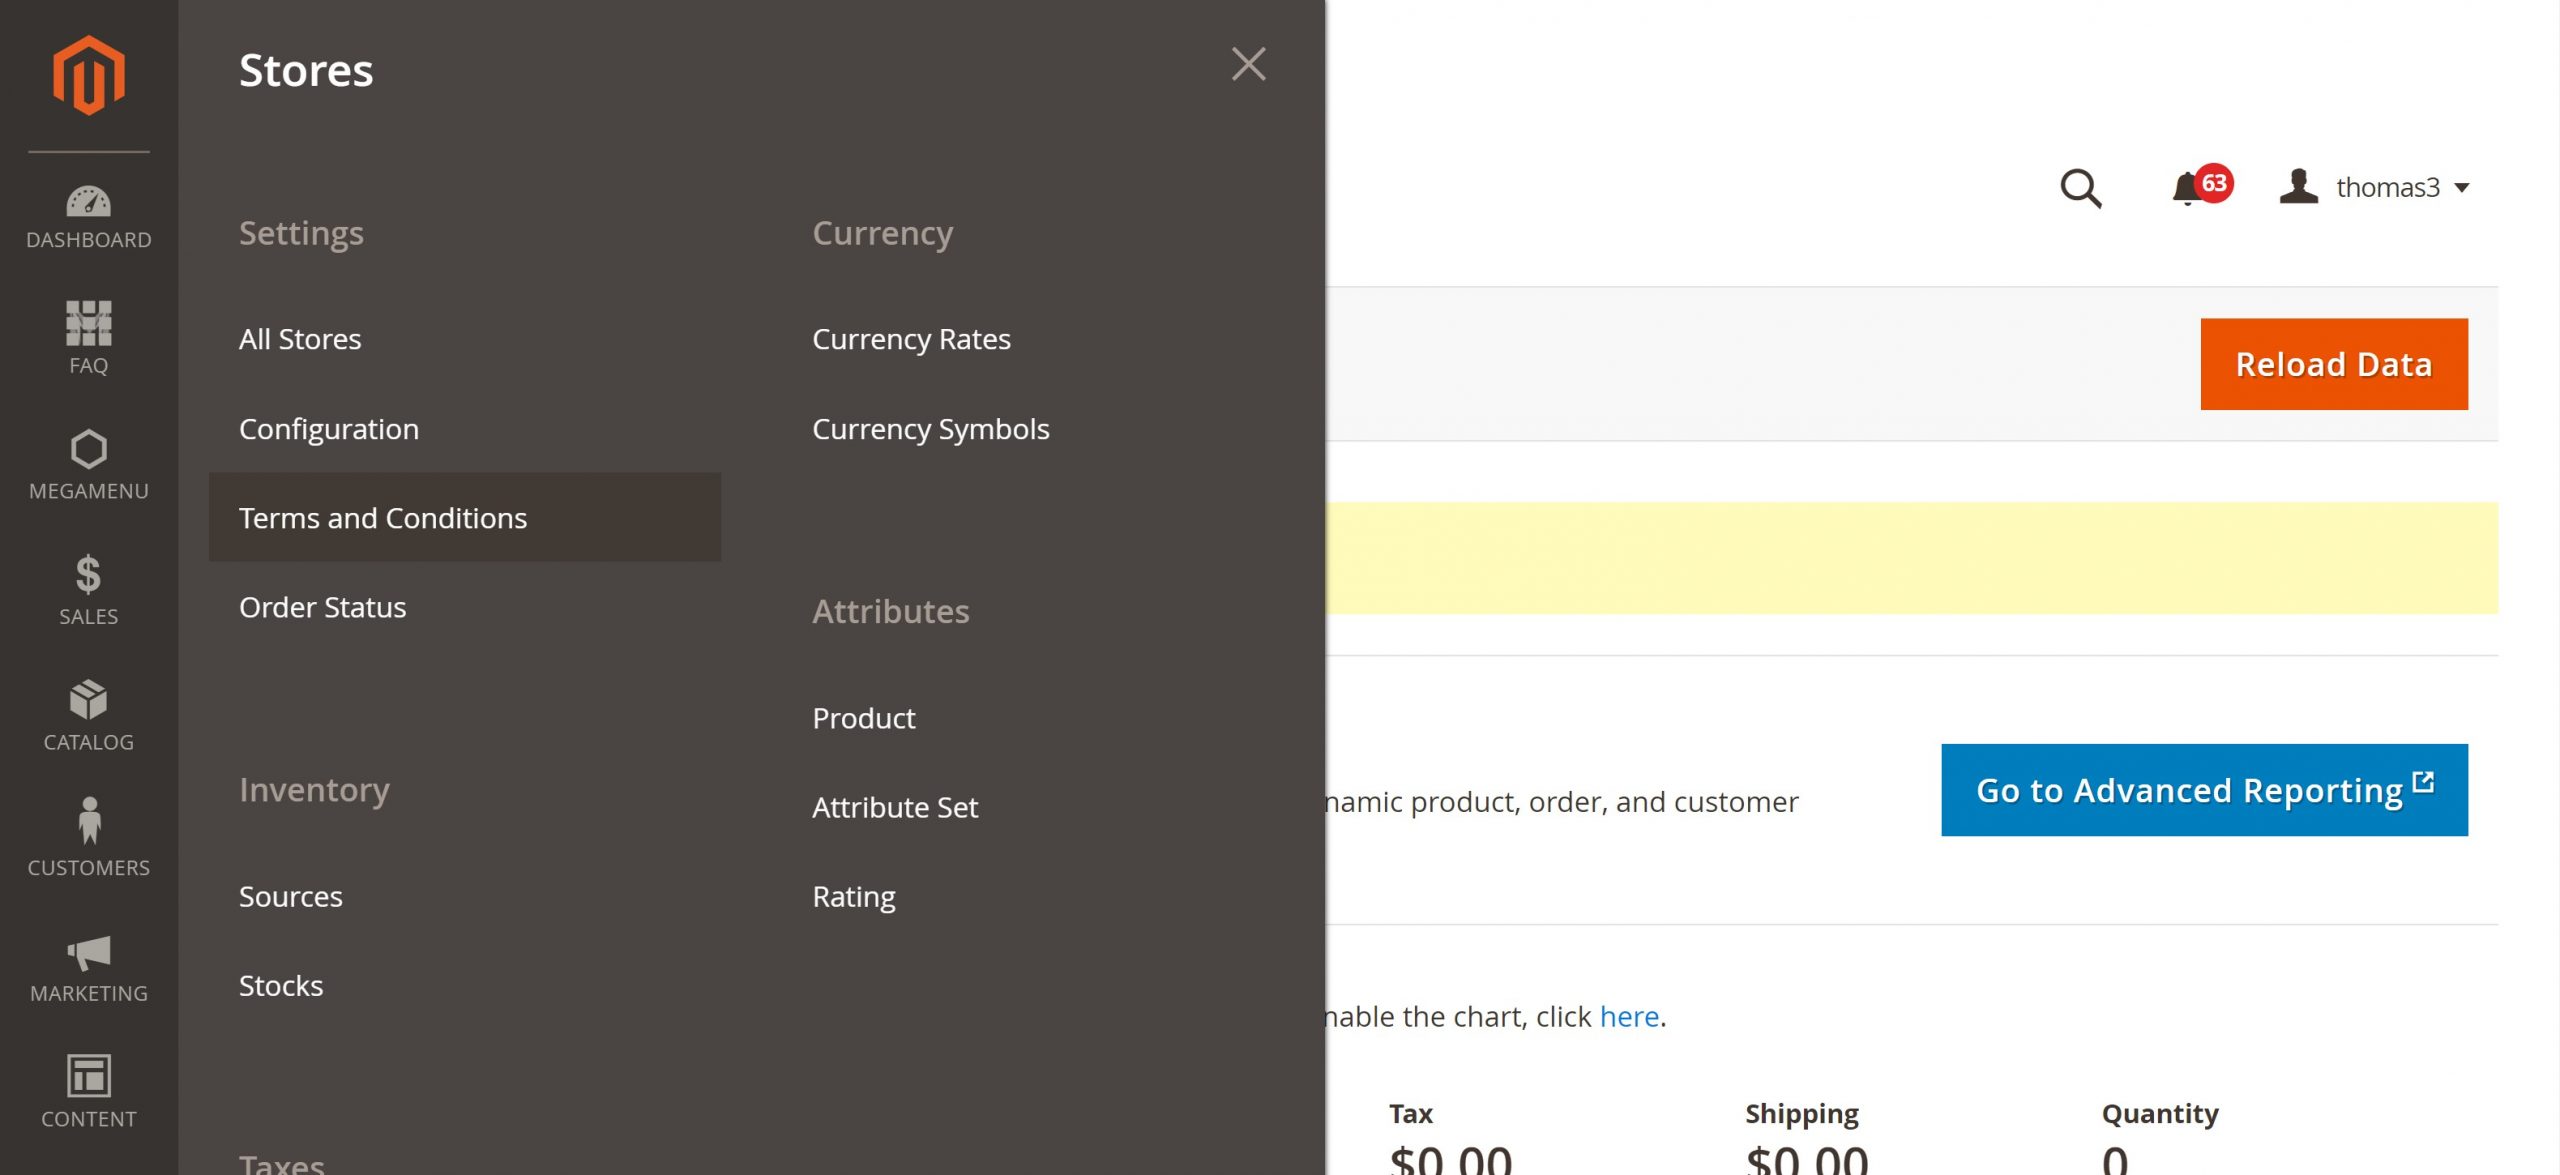
To configure an SSL certificate, you can purchase one from a reputable provider and follow the instructions provided by your hosting company. Once the certificate is installed, your store’s URL will change from “HTTP” to “HTTPS,” indicating that a secure connection has been established. Navigate to Stores > Configuration > General > Web > Base URLs (Secure) > URL with https.
Set up store URLs
Your store’s URLs serve as the addresses that customers use to access your online store. Magento allows you to configure two types of store URLs: a base URL and a secure URL. The base URL is the public URL that customers will use to browse your store, while the secure URL is used for secure transactions, such as checkout.
To set up your store URLs, navigate to the Stores & Websites section in your Magento admin panel. Here, you can add, edit, and manage your store URLs. Ensure that the URLs are accurate, easy to remember, and consistent with your brand identity.
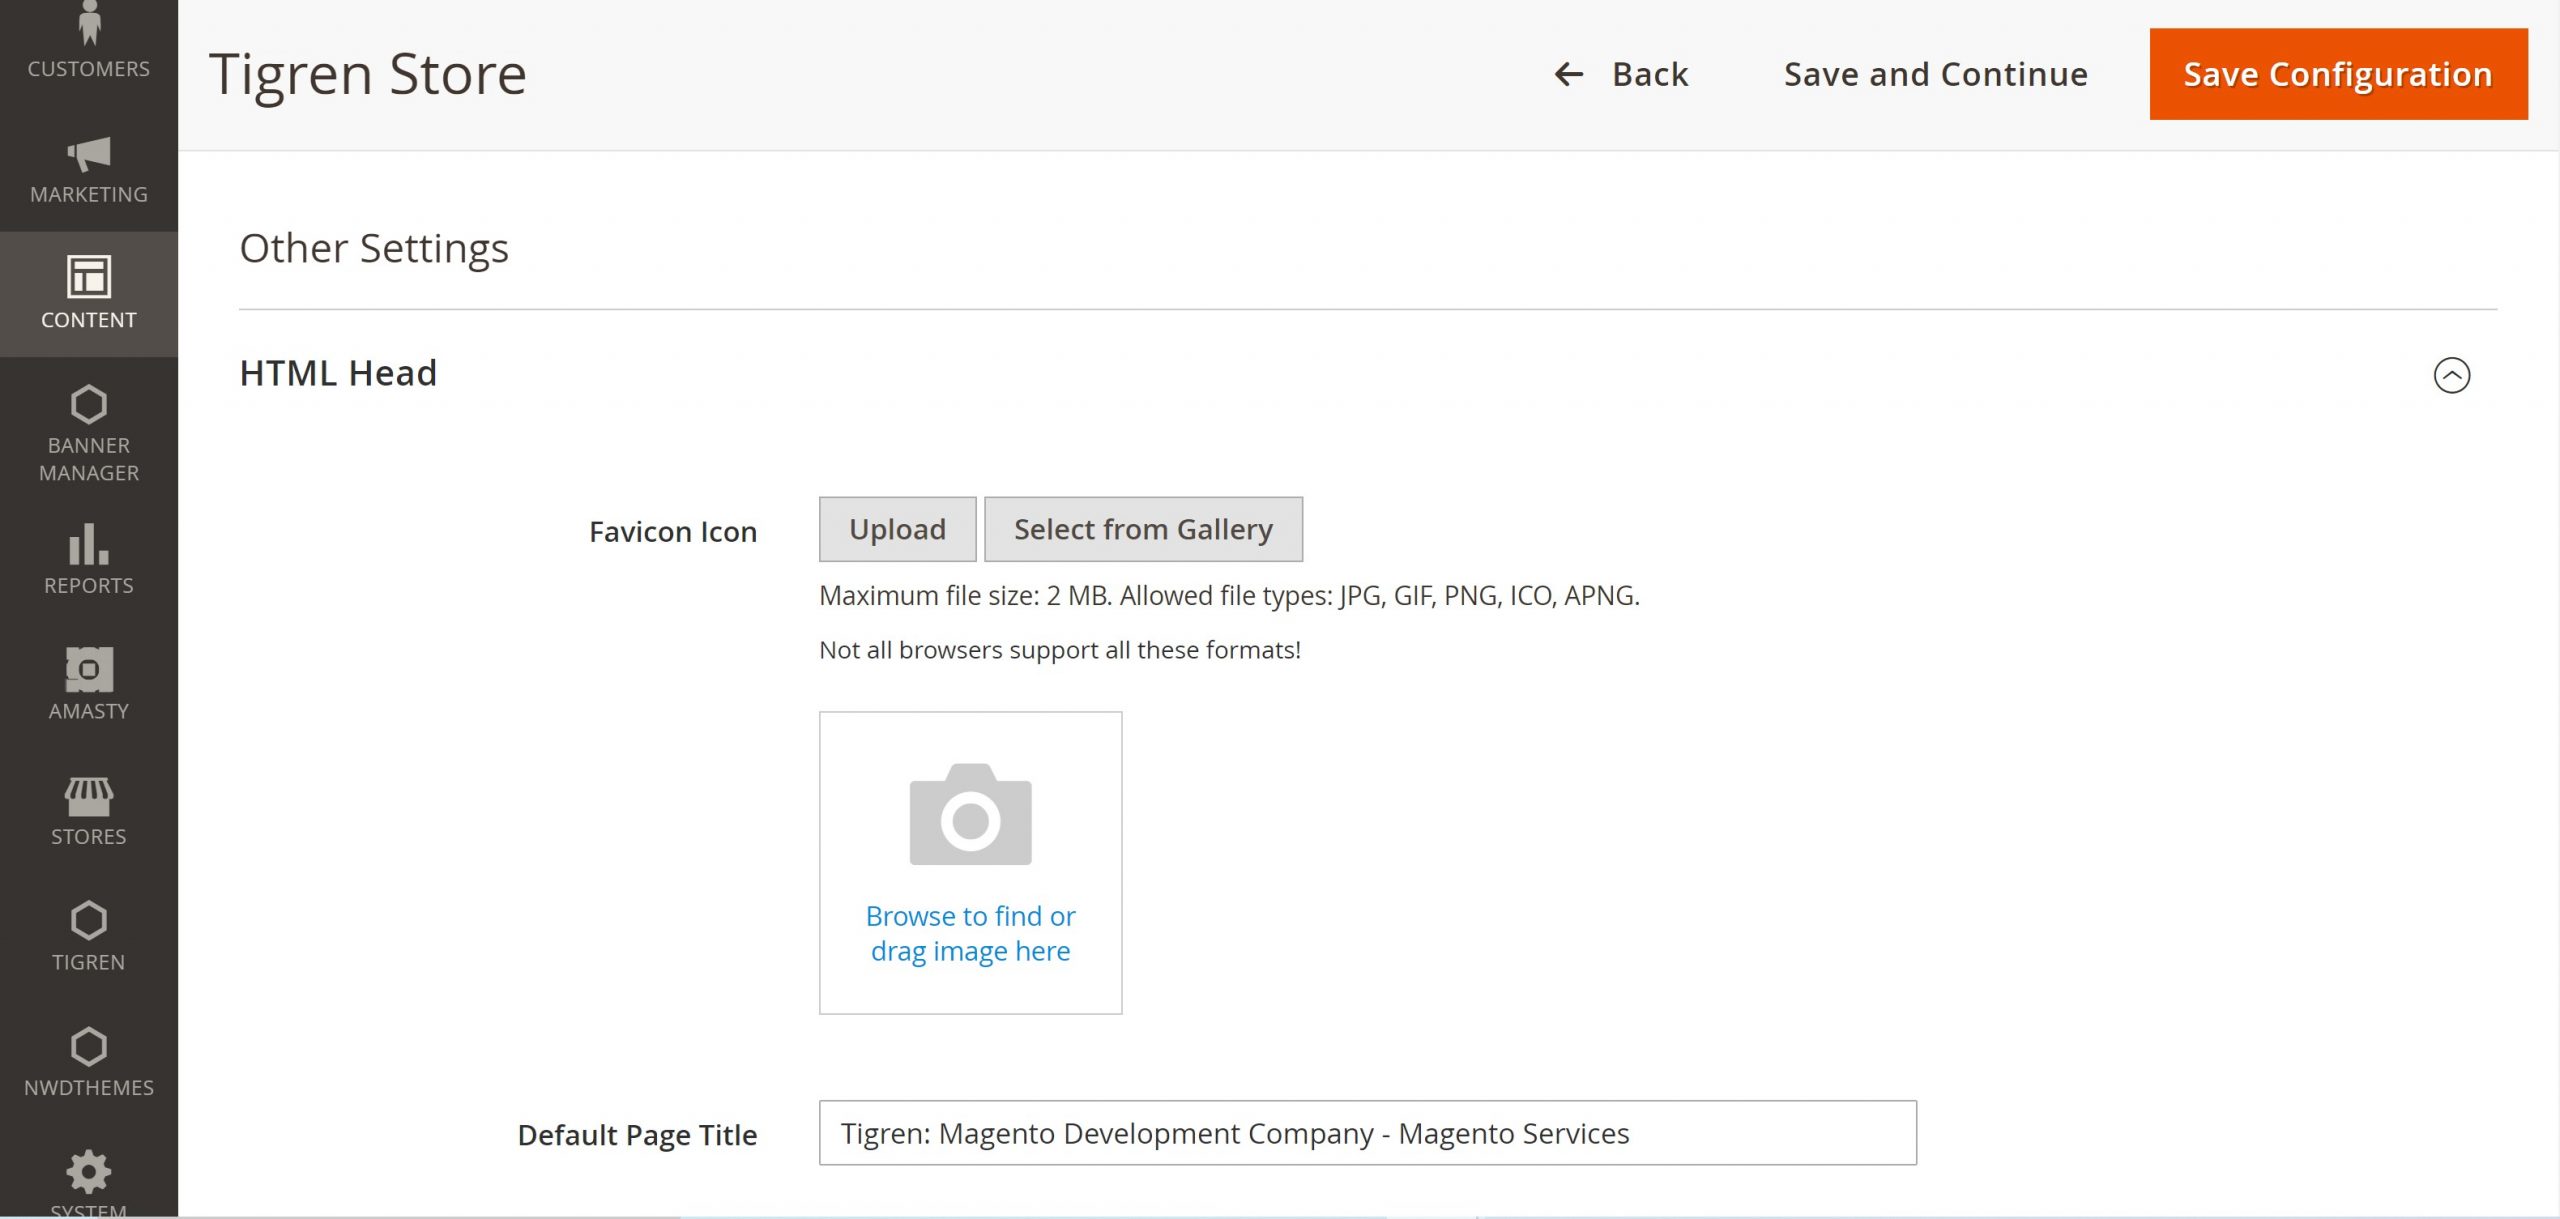
Add a favicon
A favicon, also known as a favorite icon, is a small image that appears in the browser tab or bookmark list for your store. It serves as a visual representation of your brand and helps customers easily identify your store among a multitude of open tabs.
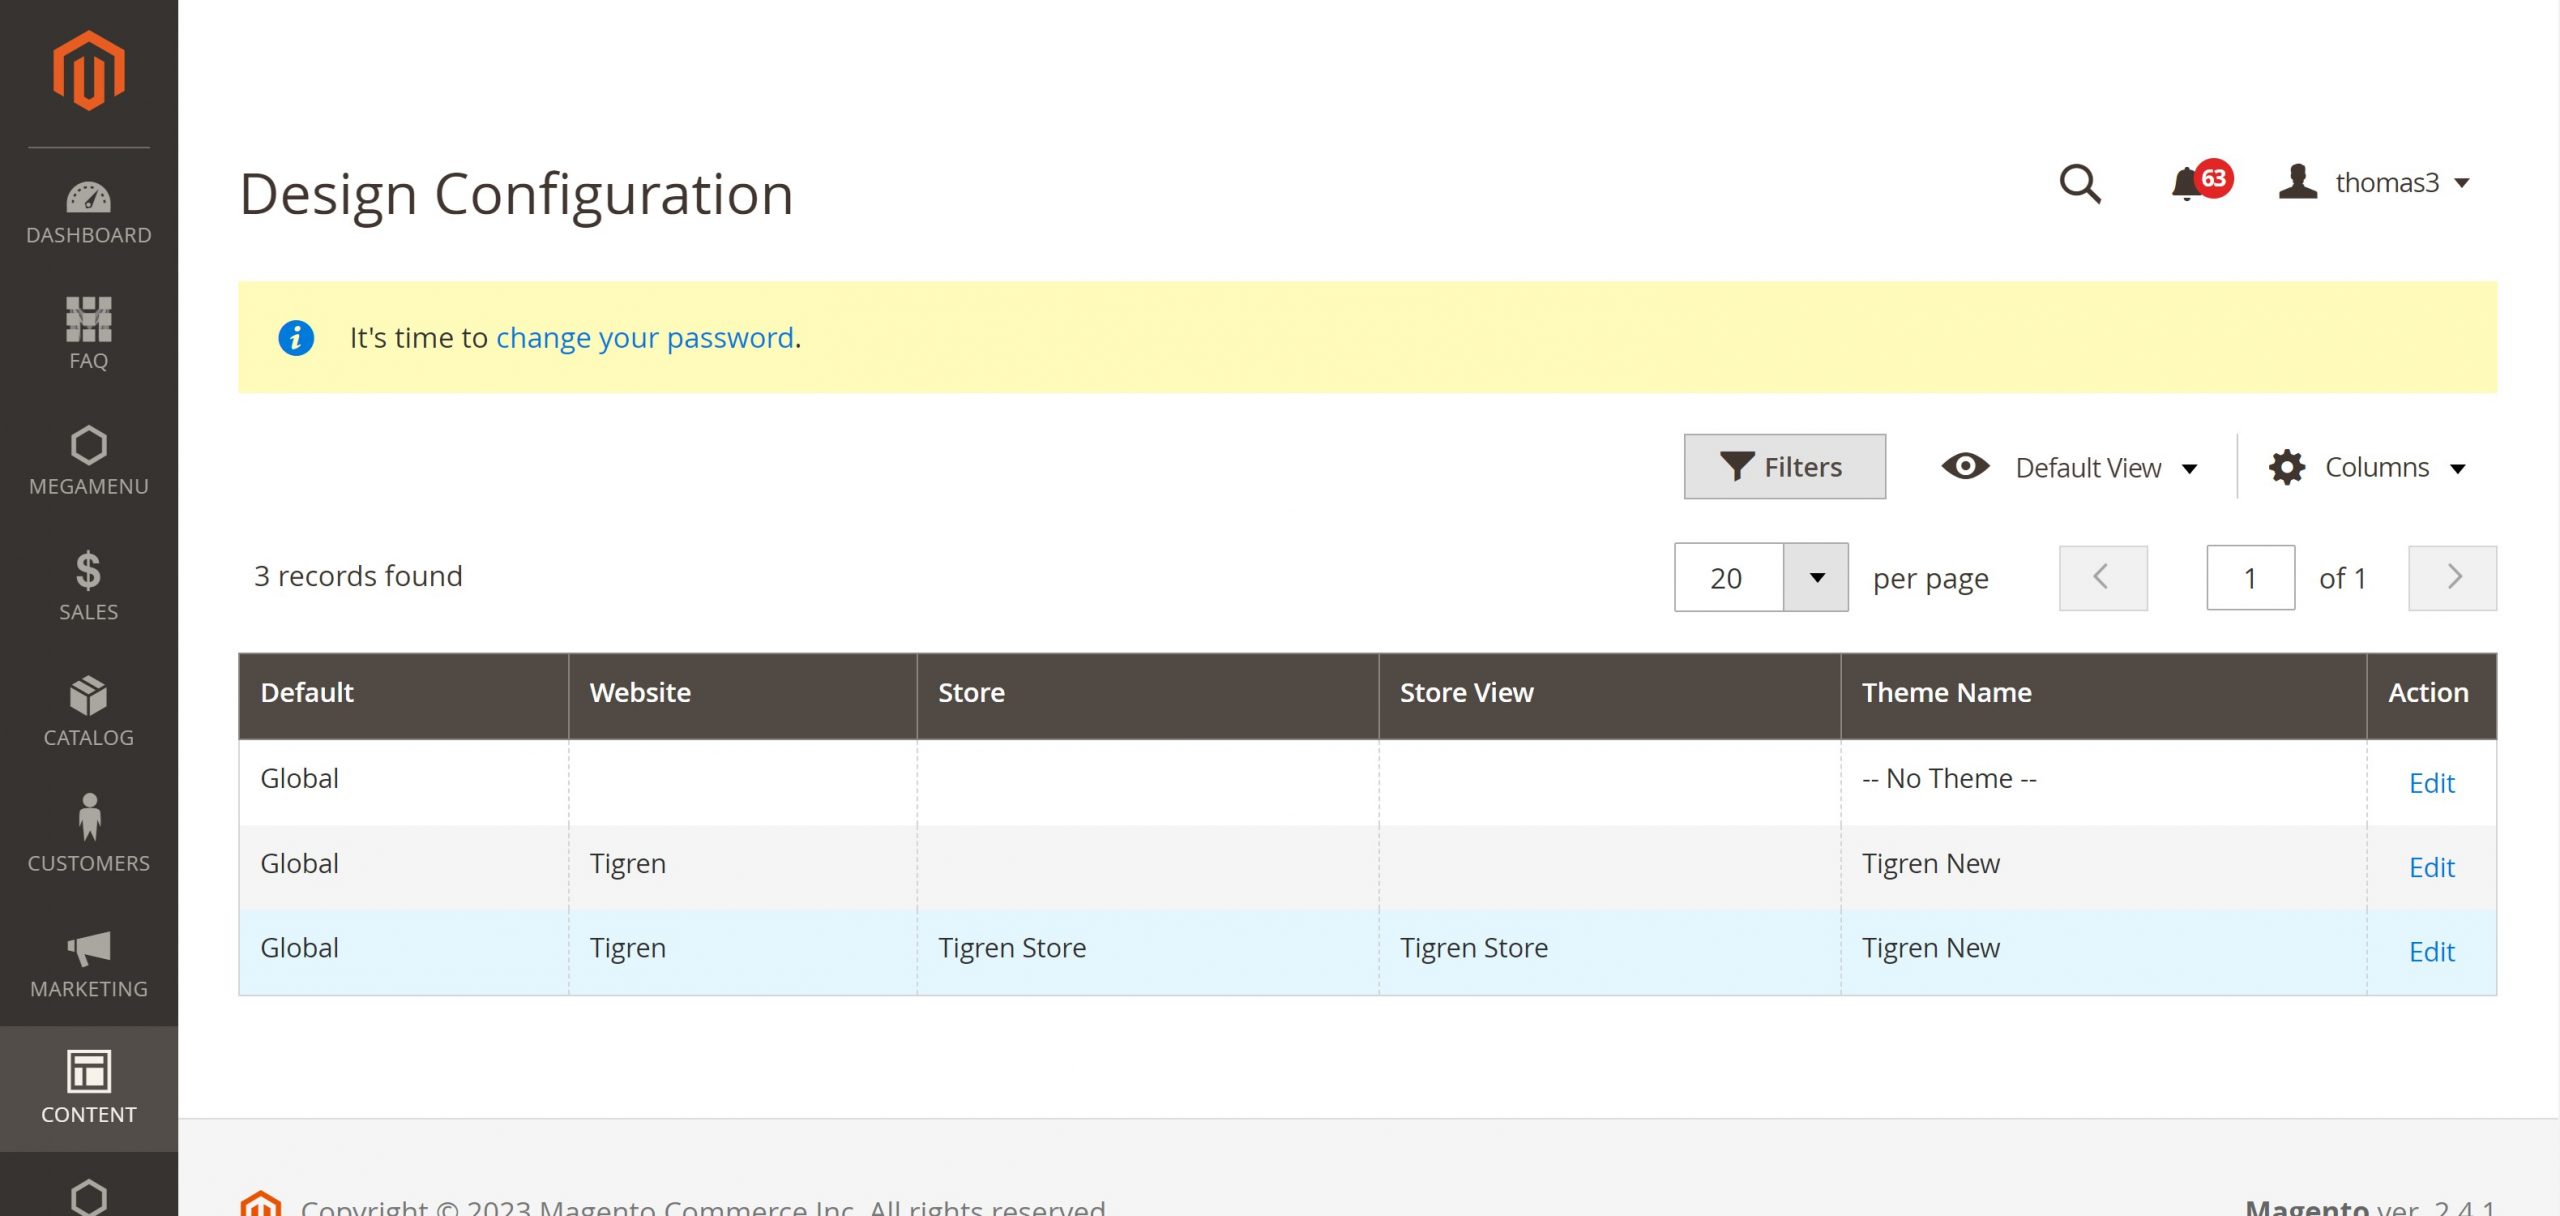
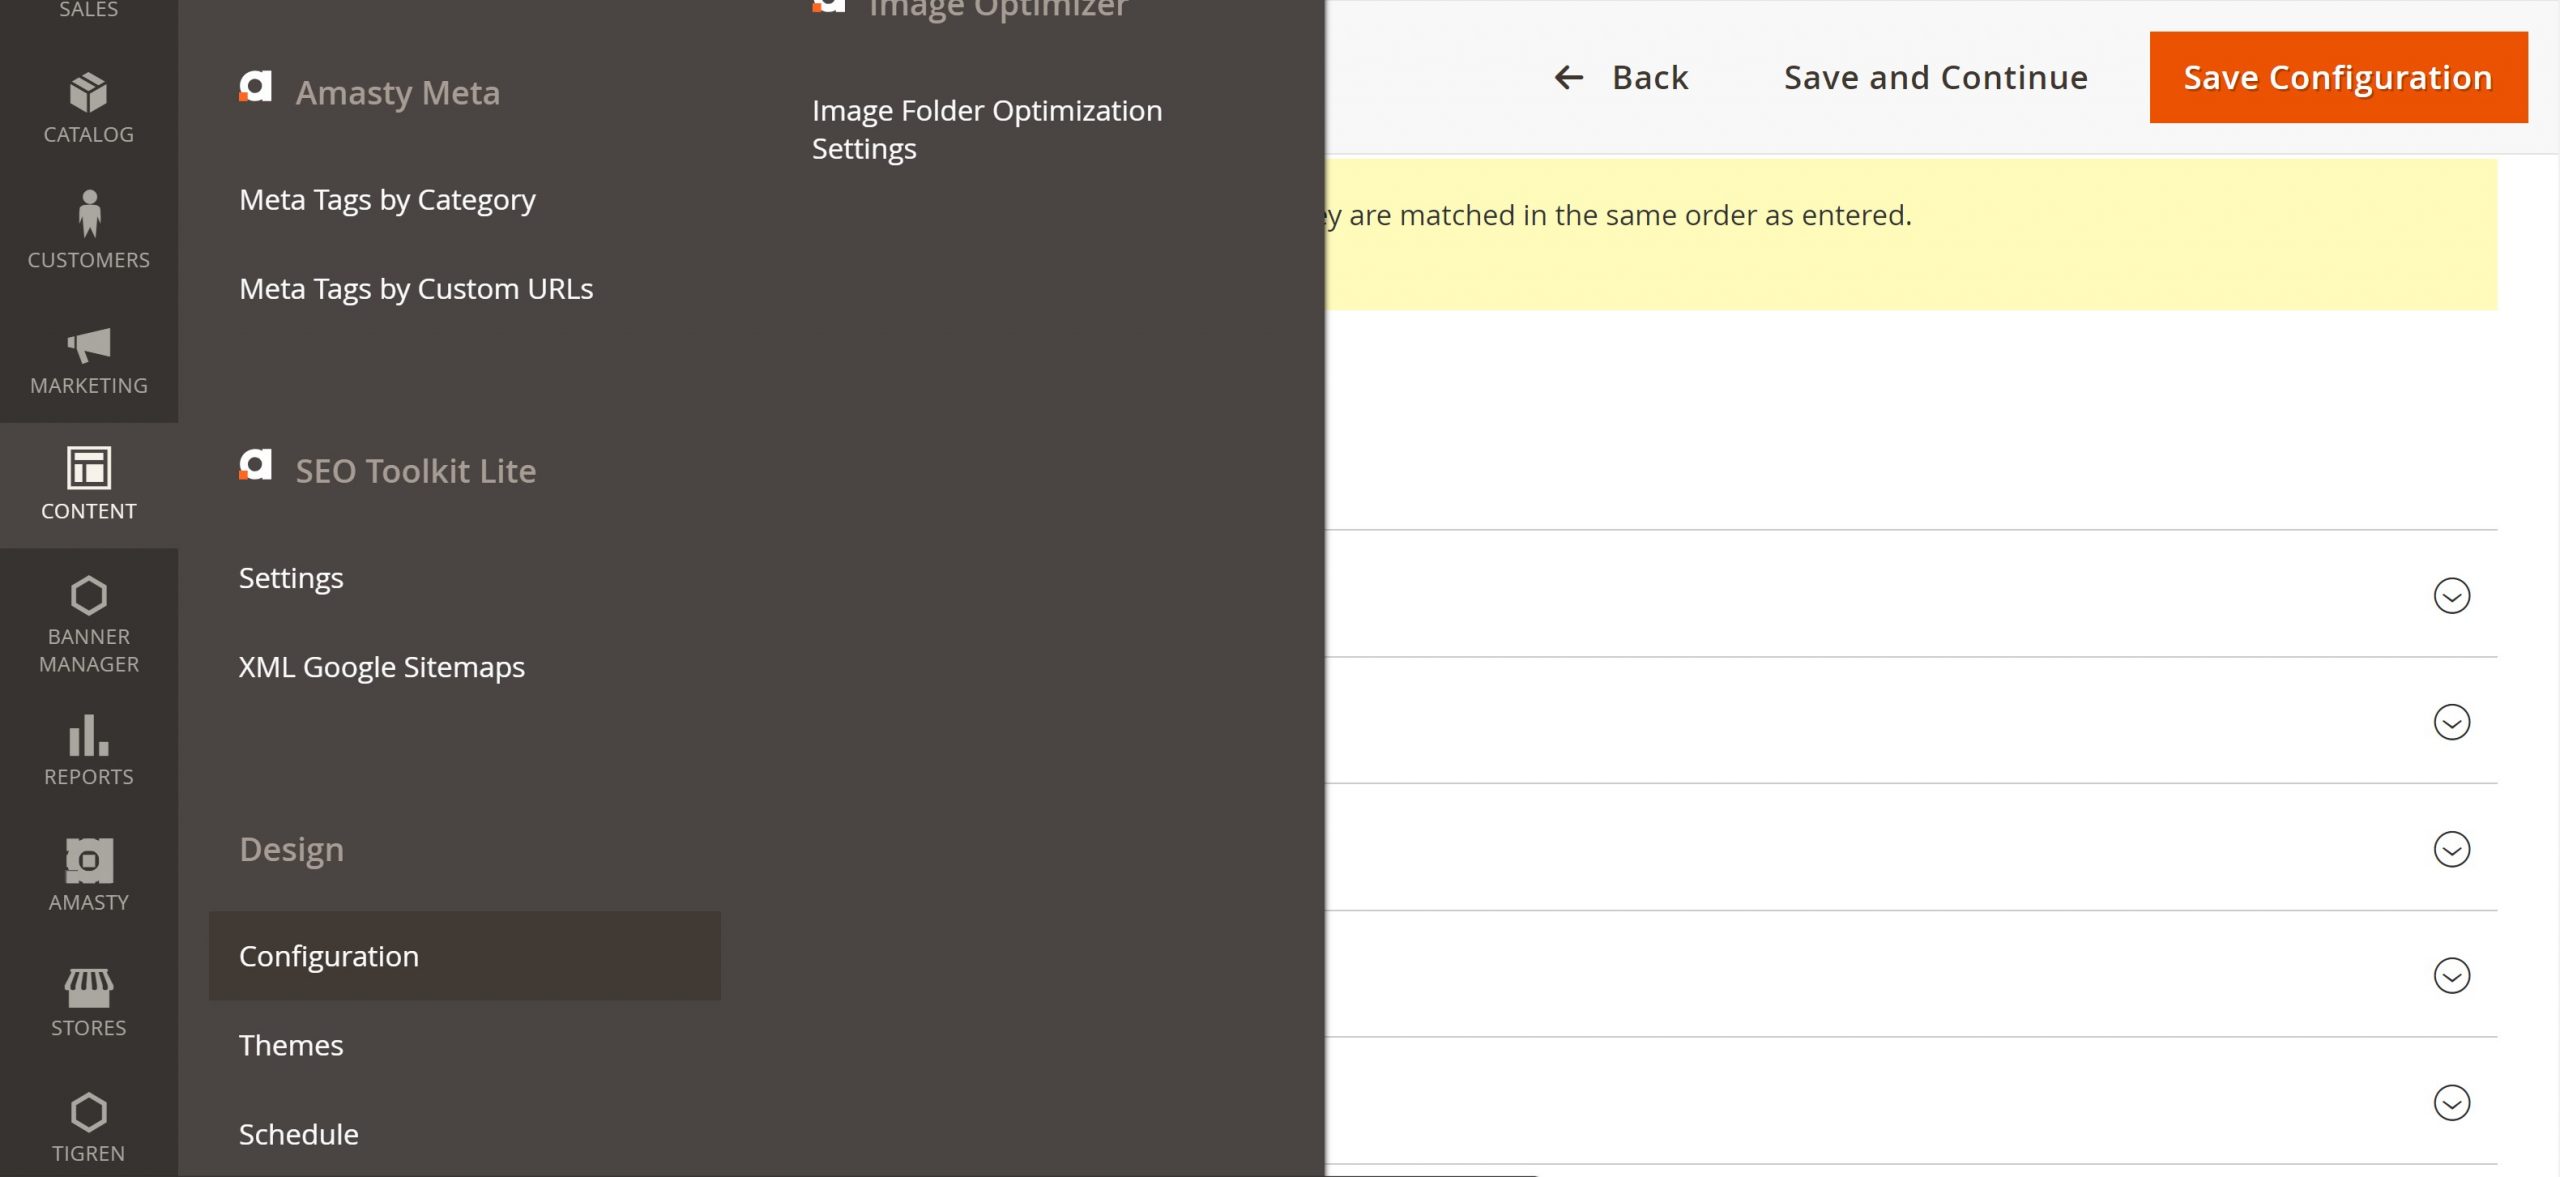
To add a favicon, go to Content > Design > Configuration. Edit store. Under HTML Head, upload the Favicon image. The favicon should be in a format supported by web browsers, such as ICO or PNG, and should be resized to the recommended dimensions.
Implement 301 redirects
If you have made any changes to your store’s structure, such as moving products to different categories or renaming product URLs, you will need to implement 301 redirects. These redirects inform search engines and visitors that the old URL has been moved to a new URL.
301 redirects help to maintain your SEO rankings and prevent broken links, ensuring that customers can seamlessly navigate your store and search engines can accurately index your content.
Create a 404 error page
A 404 error page, also known as a “Not Found” page, is a custom page displayed when a visitor tries to access a non-existent page on your store. It provides a user-friendly experience by informing visitors that the page they are looking for does not exist and offering them links to other relevant pages on your store.
To create a 404 error page, you can either edit the default Magento 404 template or create your custom page. Go to Stores > Configurations > Web > Default Pages and review all the settings. Make sure your 404 page is informative, easy to navigate, and consistent with your store’s branding.

Perform an SEO audit
Before launching your Magento store, it’s essential to conduct a thorough SEO audit to identify any potential issues that could hinder your search engine rankings. This audit should cover various aspects, including keyword usage, page titles and meta descriptions, website structure, and backlinks.
By addressing any SEO issues identified during the audit, you can improve your store’s visibility in search engine results pages (SERPs), attracting more organic traffic and boosting your online presence.
Conduct a thorough review of all content

The quality and accuracy of your store’s content play a significant role in shaping customer perception and influencing purchasing decisions. Before going live, conduct a meticulous review of all content on your store, including product descriptions, category pages, blog posts, and any other written material.
Go live
Before you launch your Magento store, it is important to take some time to prepare. This includes ensuring that your system meets the minimum requirements, setting up SSL certificates, and testing all functionalities.
Update DNS records
Once your Magento store is ready to go live, it’s crucial to update your domain name system (DNS) records to direct traffic to your new site. DNS records are the instructions that tell browsers where to find your website’s files. By updating these records, you ensure that visitors typing in your domain name are directed to your live Magento store.
To update your DNS records, you’ll need to access your domain registrar’s control panel and locate the DNS settings section. Here, you’ll need to modify the A record, which points to your store’s server IP address. The specific steps may vary depending on your domain registrar, but the process typically involves entering your IP address and saving the changes.
Monitor website performance
After your Magento store goes live, it’s essential to closely monitor its performance to identify and address any potential issues that could impact user experience and sales. This includes tracking various metrics such as:
- Page loading speed: Ensure your pages load quickly and consistently to provide a smooth user experience.
- Website uptime: Monitor your website’s uptime to ensure it remains accessible to visitors and minimize downtime.
- Server response times: Track how quickly your server responds to requests to identify any performance bottlenecks.
- Error rates: Monitor the occurrence of error codes such as 404s and 500s to address underlying issues promptly.
By proactively monitoring your website’s performance, you can identify and resolve problems early on, preventing disruptions and maintaining a positive user experience.
Address customer feedback
Customer feedback is a valuable source of information for improving your Magento store and providing a more satisfying shopping experience. Actively seek feedback from customers through surveys, reviews, and direct communication.
Analyze customer feedback to identify common themes, such as product satisfaction, website navigation, and customer support experiences. Use these insights to make informed decisions about product improvements, website design changes, and customer service enhancements.
By addressing customer feedback and making continuous improvements, you can build customer loyalty, enhance brand reputation, and drive long-term success for your Magento store.
By implementing these measures during the go-live phase, you can ensure a seamless transition and maintain a high level of performance and customer satisfaction for your Magento store.
Post-Go live
Once your Magento store has gone live, it is important to continue monitoring its performance and making improvements. This includes monitoring website traffic, analyzing SEO rankings, and gathering customer feedback. It is also important to keep your Magento installation up to date and regularly review and update your content.
Continue to monitor website performance

Even after your Magento store goes live, it’s crucial to continue monitoring its performance to ensure it remains optimized and delivers a positive user experience. This includes tracking key metrics such as:
- Page loading speed: Regularly check your website’s page loading speed to identify and address any slowdowns that could impact user experience.
- Server response times: Monitor how quickly your server responds to requests to ensure it can handle the volume of traffic your store receives.
- Error rates: Keep an eye on the occurrence of error codes such as 404s and 500s to promptly address any underlying issues.
- Uptime: Monitor your website’s uptime to ensure it remains accessible to visitors and minimize downtime.
By continuously monitoring website performance, you can proactively identify and resolve issues before they affect your customers’ experience or hinder your store’s growth.
Keep your Magento installation up to date
In the ever-evolving world of e-commerce, staying up-to-date with the latest Magento releases is essential for maintaining a secure, stable, and feature-rich platform. Magento regularly releases updates that address security vulnerabilities, introduce new features and enhancements, and improve overall performance.
To ensure your Magento installation remains up-to-date, follow these steps:
- Subscribe to Magento’s security notifications: Magento provides email notifications for critical security patches, allowing you to promptly apply them and protect your store from potential exploits.
- Regularly check for available updates: Log in to your Magento admin panel and navigate to the System > System Information section. Here, you can check for available Magento updates and install them as needed.
- Consider using a managed Magento hosting provider: Many managed Magento hosting providers offer automatic update services, ensuring your Magento installation remains current without manual intervention.
By keeping your Magento installation up-to-date, you can safeguard your store from security threats, access the latest features and enhancements, and maintain optimal performance for your growing business.
Regularly review and update your content
A dynamic and engaging online store requires fresh and up-to-date content. Regularly review and update your product descriptions, category pages, blog posts, and other written material to keep your store relevant, informative, and engaging for customers.
Here are some tips for regularly updating your content:
- Review product descriptions: Ensure product descriptions are accurate, reflect current product specifications, and use relevant keywords to improve search engine rankings.
- Refresh category pages: Update category descriptions, titles, and subcategories to reflect any changes in product offerings or customer preferences.
- Publish new blog posts: Regularly publish high-quality blog posts that provide valuable insights, industry trends, and engaging content related to your products or services.
- Revise static content: Review and update any static content on your website, such as company information, terms of service, and privacy policy.
By keeping your content fresh and relevant, you can maintain customer interest, attract new visitors, and strengthen your brand’s online presence.
Monitor your SEO rankings
Search engine optimization (SEO) plays a crucial role in driving organic traffic to your Magento store. Regularly monitor your SEO rankings for relevant keywords to assess the effectiveness of your SEO efforts and identify areas for improvement.
Several tools can help you track your SEO rankings, such as Google Search Console, SEMrush, and Ahrefs. These tools provide insights into your website’s position in search results, identify top-ranking keywords, and suggest optimization strategies.
By monitoring your SEO rankings and implementing data-driven improvements, you can increase your website’s visibility in search results, attract more organic traffic, and boost your store’s sales potential.
Analyze your website traffic data

Understanding your website traffic patterns can provide valuable insights into customer behavior, marketing effectiveness, and areas for improvement. Regularly analyze your website traffic data using tools such as Google Analytics to gain actionable insights.
Key metrics to analyze include:
- Traffic sources: Identify the channels through which visitors arrive at your store, such as organic search, social media, or paid advertising.
- Popular pages: Determine which pages on your store receive the most traffic and analyze their content and design to identify best practices.
- User behavior: Track user’s engagement metrics such as bounce rate, average time on page, and conversion rate to identify areas where you can improve user experience and optimize conversions.
By analyzing your website traffic data, you can make informed decisions about marketing campaigns, content optimization, and website design to enhance user experience and drive business growth.
Don’t miss out on the opportunity to launch your Magento 2 store with the help of Tigren’s expert team of Magento developers and designers.
See Also: